DISCLOSURE: This post may contain affiliate links, meaning when you click the links and make a purchase, we receive a commission.
Almost every website depend on ‘PHP’ one way or another. PHP scripts are one of the main reasons that your website is running without any hassle. ‘PHP 5.5’ was released in 2013 and the support for that version was ended in 2016. After that, several newer versions were released. As usual, all of them came out with some additional features.
So, if any website owners want to get the best out of their websites. Then it is a must to update the ‘PHP’ version of the websites. Unfortunately, most of us don’t even aware of the fact that we can update or change the PHP version of our websites.
When we are writing this article, the latest version of PHP available is 7.2. So, it is better if you update your website’s PHP version to version 7.2 or at least version 7.0 at this point. There are lots of benefits on updating the PHP version of your website. Among them, the main reason is to get a better performance from your website.
If you want to change the PHP version but don’t know how to do that. Then you need to read the rest of the article. In this article, we will let you know how to change the PHP version if you have a SiteGround web host. If you don’t have a SiteGround web host account. You can follow the guide as well. As the basic principles of changing PHP version will be similar for all of the popular web hosts.
So, let’s get to the good part.
How to Change PHP Version on SiteGround
The next two sections are for the WordPress users specially. So, if you don’t use WordPress you can skip them.
For WordPress users only:
#1. How to check which version of PHP you are using on WordPress?
As we have mentioned that changing the PHP version can be very beneficial to your website. Yet, if any of the themes or plugins are not compatible with the latest PHP versions, then you might face some issues. So, if you want to get rid of that it is better to know what version you are using now. So, if anything goes wrong, you can revert back to it later.
Tip: If you know how to install and activate a plugin you can skip this part. Just install and activate the ‘Display PHP Version’ plugin
You can check the PHP version of your website using a plugin on WordPress. You have to install and activate the ‘Display PHP Version’ plugin on your WordPress website. So, if you don’t know how to do that follow along with us.
- Log in to your WordPress dashboard
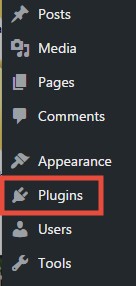
- Now, from the left sidebar, clicking the ‘Plugins’ button and a new page will open on the right-hand side
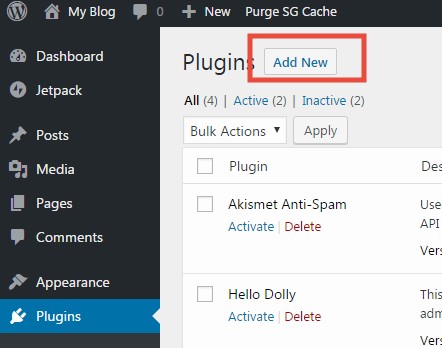
- From that page, click on the ‘Add New’ button on the top
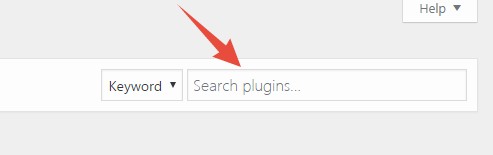
- The next page will be the page from where you can install new plugins. So, look at the top right corner of the screen and you will see a search box
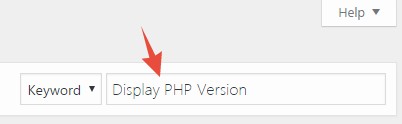
- Type in ‘Display PHP Version’ on the search box and click the ‘Enter’ button on your keyboard
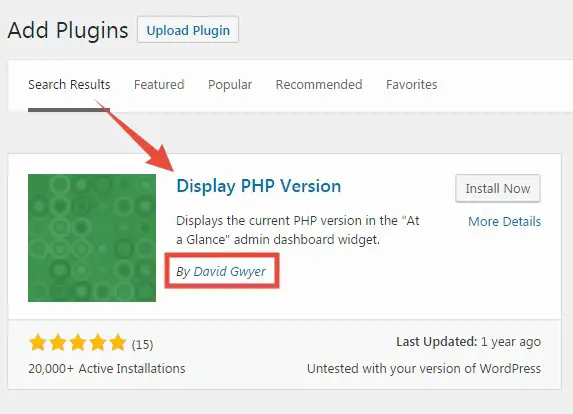
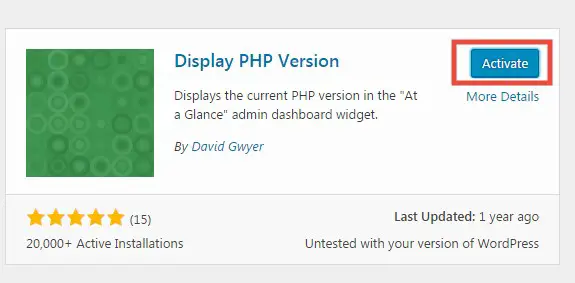
- Now, under the search results, you will find the plugin which you are searching for. It will be the first one and it was created by ‘David Gwyer’. Now, you have to install this
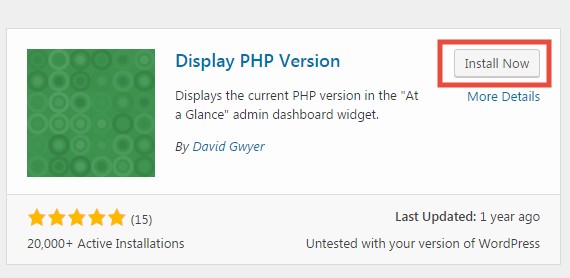
- So, click on the ‘Install Now’ button and the installation will be started instantly
- Next click on the ‘Activate’ button to activate the plugin
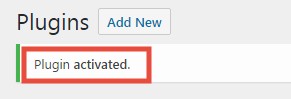
- You will see a notification saying the plugin is activated
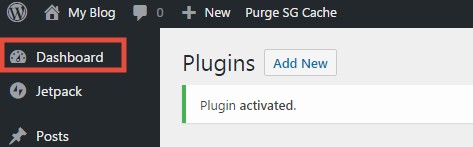
- Now, go to the dashboard of your WordPress backend by clicking on the ‘Dashboard’ button from the left sidebar
- Now, you will see the current PHP version of your website under the ‘At a Glance’ section
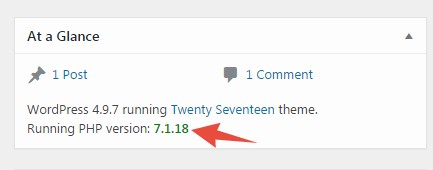
Well done. You have just checked the version of current PHP version of your website. Now, if you see that you are using an older version then you need to update it. But, before you update, you need to check the compatibility of the new version which you are going to use next.
Because, if you have some themes or plugins which are not compatible with the latest PHP version then that will be a problem. So, it’s better to check the compatibility before you change the PHP version. Let’s see how to do that.
#2. How to check PHP version compatibility on WordPress?
As you might have already guessed that this part of the article is also for the WordPress users. So, if you’re not a WordPress user then you can skip this part too. Otherwise, let’s go ahead.
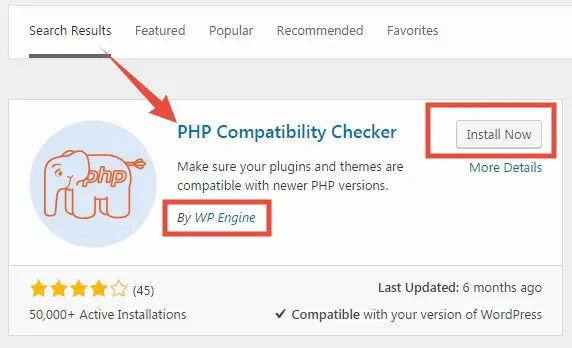
To check the compatibility, the easiest way is to use a plugin called ‘PHP Compatibility Checker’. If you know how to install and activate a plugin then install this plugin. But, if you are not aware of the process then check the previous section of this article where we showed you how to install and activate a plugin.
- We assume that you have installed and activated the ‘PHP Compatibility Checker’ plugin on your website. It is developed by ‘WP Engine’
- When the plugin will be activated for the first time, you will see a similar notification like the image below on your WordPress dashboard. So, click on the ‘Start scanning…. Versions now!’ link from the top of the page

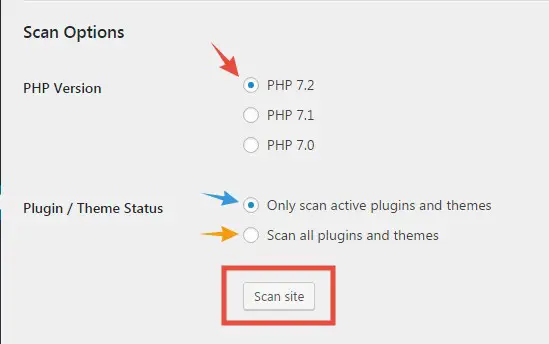
- On the next page, you will find a few options to scan your website’s theme and plugins. You can check the compatibility for three PHP versions which are PHP 7.2, PHP 7.1, and PHP 7.0. You can also choose between two options for the themes and plugins of your website. So, chose the options which you prefer the most and click on the ‘Scan Site’ option
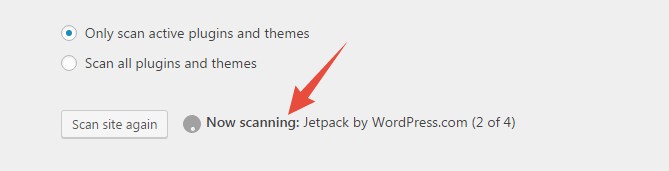
- Immediately, the scan will be started. Wait for the scan to be completed. The time will depend on the number of themes and plugins you have on your website. So, it can take a long time
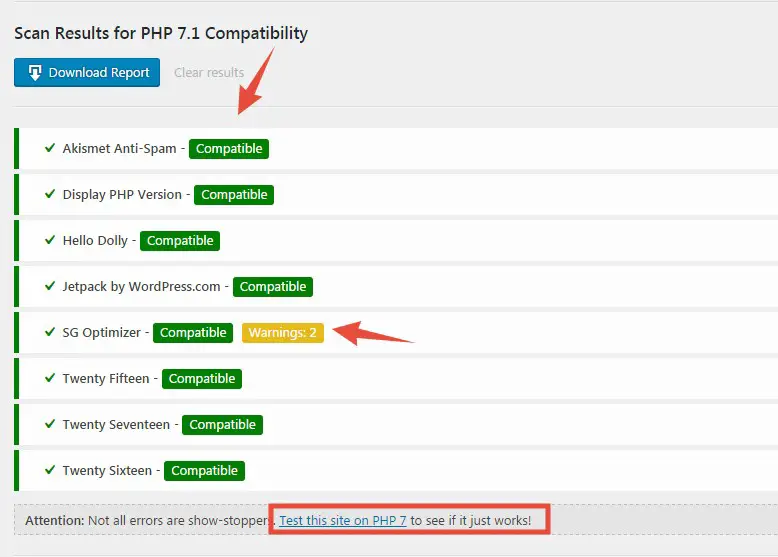
- After the scan is done, the scan results will be available. Now, you will get three types of results which are ‘Compatible, Warnings, and Errors’. All of them are self-explanatory. If you find that everything is compatible then you can proceed and update the PHP version. But, if you find some errors or warnings, check the source of them. Most probably, it will be some themes or plugins. If those are not very important for your website then you can update the PHP version. Just, uninstall those incompatible themes or plugins. Or else you can test the compatibility for another PHP version again. And then install that version
By this time, you already know the current PHP version of your website. Plus, you have checked the compatibility of the new PHP version to which you are ready to switch. Now we will show you how to change the PHP version in the following section. So, you can follow along.
How to change the PHP Version on SiteGround web hosts?
There are two ways to change the PHP version on SiteGround web hosts. One is easier than the other. You can follow any one of them. For the purpose of this tutorial, we will explain both of the methods below. So, here we go.
Method 1. Using the PHP version manager from SiteGround cPanel:
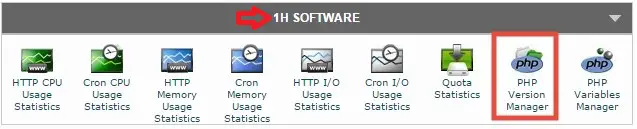
- Log in to the cPanel dashboard of your SiteGround hosting account
- Now, scroll down until you find the ‘1H SOFTWARE’ section. From there, click on the ‘PHP Version Manager’ button
- On the next page, you will find the list of the folders on your website
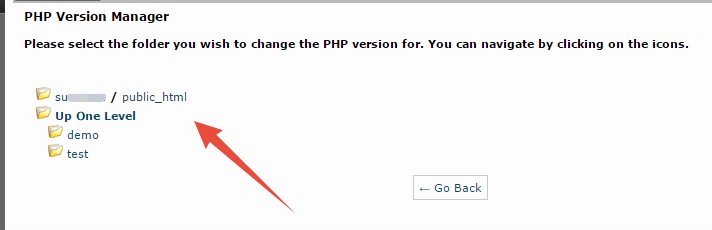
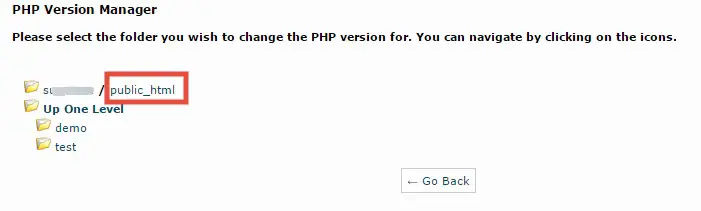
- Normally, the ‘Public_html’ folder is the primary folder to host files and folders for any website. So, you have to change the PHP version of that particular folder. In doing so, the PHP version will be automatically changed for all of the sub-directories of the ‘Public_html’ directory. So, click on the ‘public_html’ folder to proceed. Optional: If you want to change the PHP version of any other folders, you should click on that specific folder
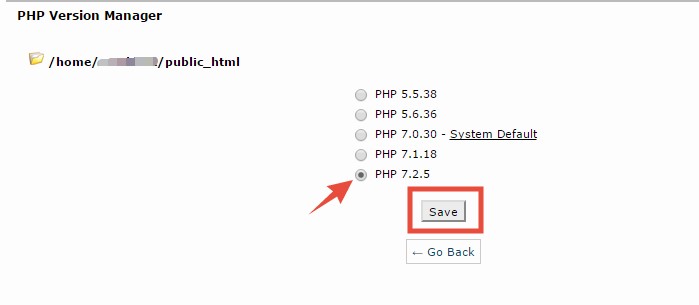
- On the next page, you will see all of the available PHP versions for your website
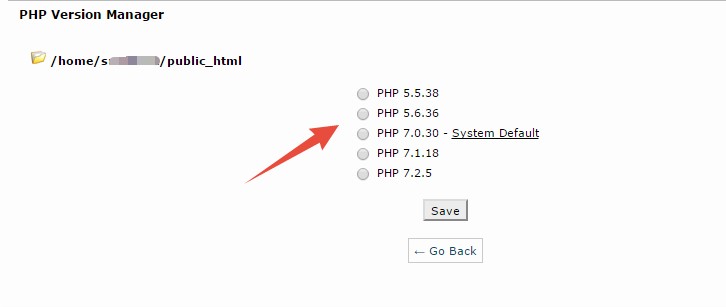
- Now, select the version you want from that list. In our case, we will change to the PHP version 7.2.5, so we have selected that. And then click on the ‘Save’ button to proceed
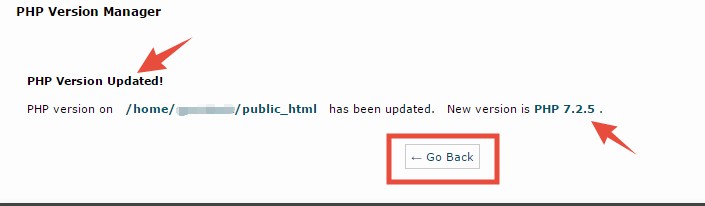
- On the next page, you will see the message saying the PHP version was updated. You can click on the ‘Go Back’ button to return to the previous page
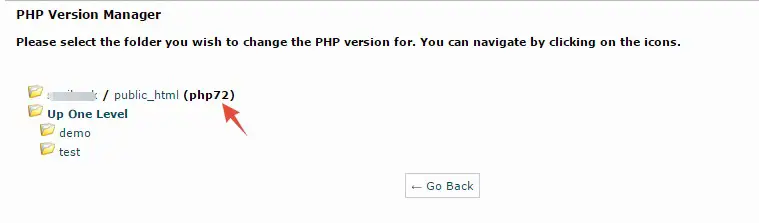
- On that page, you will find the current PHP version next to the ‘public_html’ folder
Now, you have learned the first method of changing the PHP version on SiteGround website. Next, we will walk you through the second method.
Method 2. Editing the .htaccess file from cPanel:
In this method, we will tell you how to change the PHP version by editing the ‘.htaccess’ file from the cPanel. If you are not familiar with this then you might be wondering if it’s a hectic method or not. Fear not. We can assure you this is very easy to do. And as always, we will walk you through the whole process. So, let’s jump in.
Remark: Before attempting this method, take a backup of your .htaccess file or if possible your entire website. Rather, if you have ‘Staging’ feature on your hosting account you can use that feature too
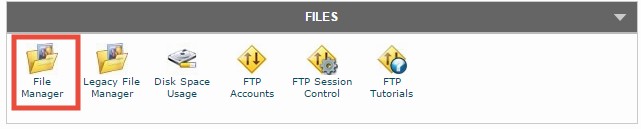
- Log in to your cPanel account by using your username and password
- Now, navigate to the ‘Files’ section and click on the ‘File Manager’ button from there
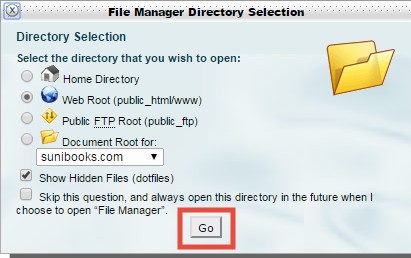
- A popup will appear. From that popup window, add a check-mark next to the option ‘Show Hidden Files’. Then, Select the domain name from the drop-down menu of which you want to change the PHP version. If you have only one domain connected to your website then that will be automatically selected. Also, check that if the ‘Web Root (public_html/www)’ option is selected
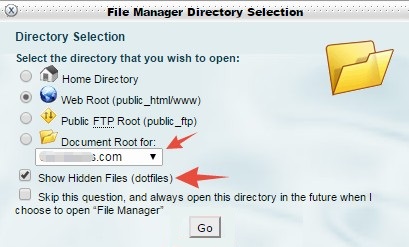
- After you have done the required things, click on the ‘GO’ button to advance. A new tab will be opened on your browser
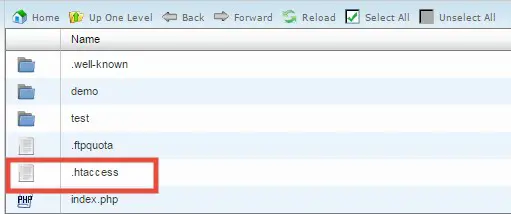
- On that tab, you will see the all of the files of the ‘public_html’ folder are listed on the right-hand side of the screen
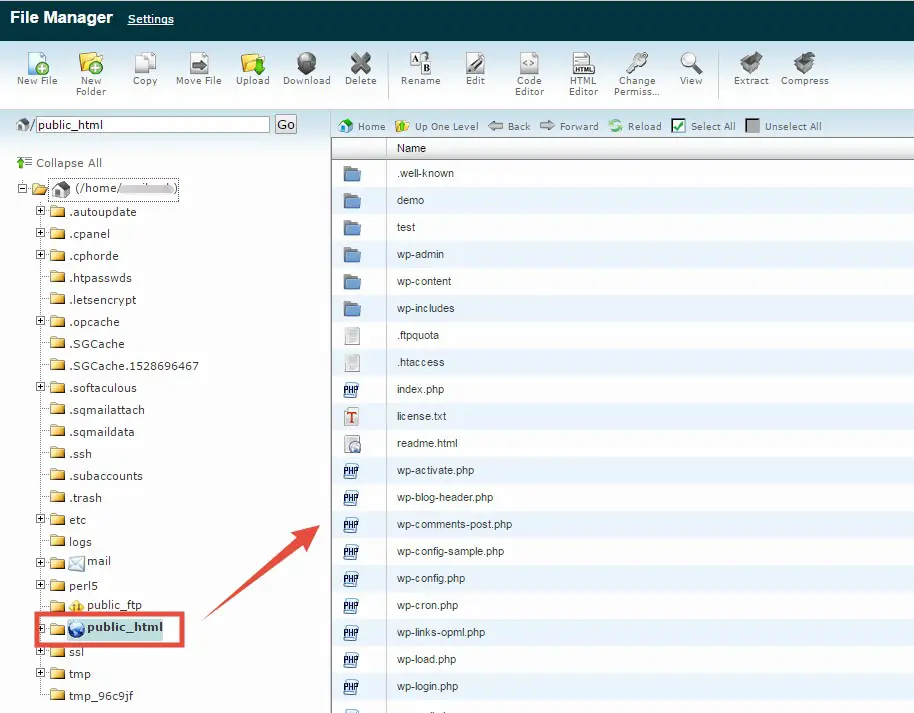
- Now, you have to edit the ‘.htaccess’ file from that list
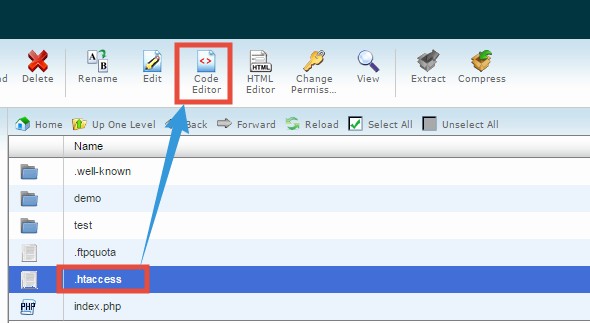
- So, click on the ‘.htaccess’ file to select it and then click on the ‘Code Editor’ button from the top menu bar
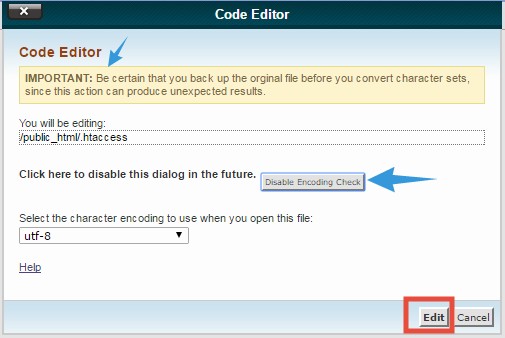
- Another popup window with a warning will appear. It is normal. If you want to disable this warning for the future, you can click on the ‘Disable Encoding Check’ button. That way, it will not appear anymore. Finally, click on the ‘Edit’ button to get to the next page
- On the next page, you will find some lines of codes. Wait, don’t be afraid. We will explain what to do next
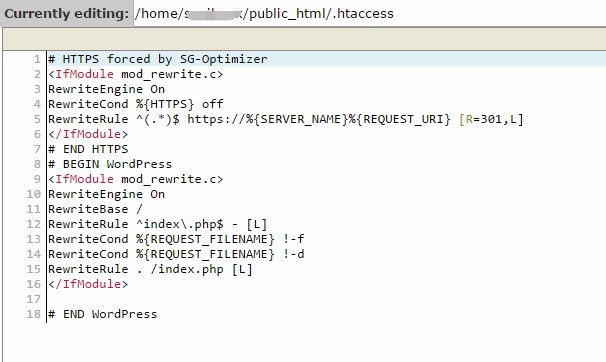
- If you look at the last line, you will find a line somewhat similar to this- ‘AddHandler application/x-httpd-php70 .php .php5 .php4 .php3’. If you see one then you need to clear that line first and then add another line instead of that. Conversely, if you don’t see any line similar to this on that page. Don’t worry. It’s normal. In that situation, you don’t need to clear anything instead you can just paste the new line. In our case, it was ‘AddHandler application/x-httpd-php70 .php .php5 .php4 .php3’. The number after ‘x-httpd-php’ indicate the PHP version. In this instance, it is ‘70’ which means the PHP version 7.0 is running on our website
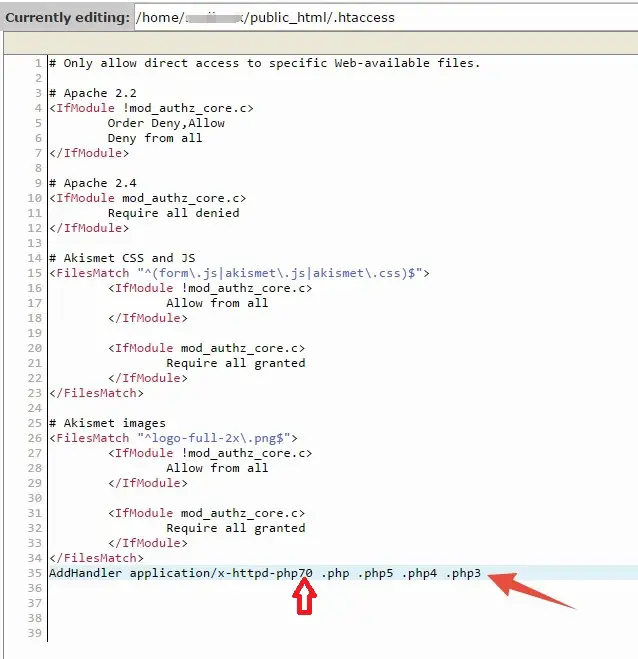
- Just put your mouse pointer on that line and use the ‘Backspace’ key on your keyboard to clear that line. After clearing that line, there will be an empty line like the image below
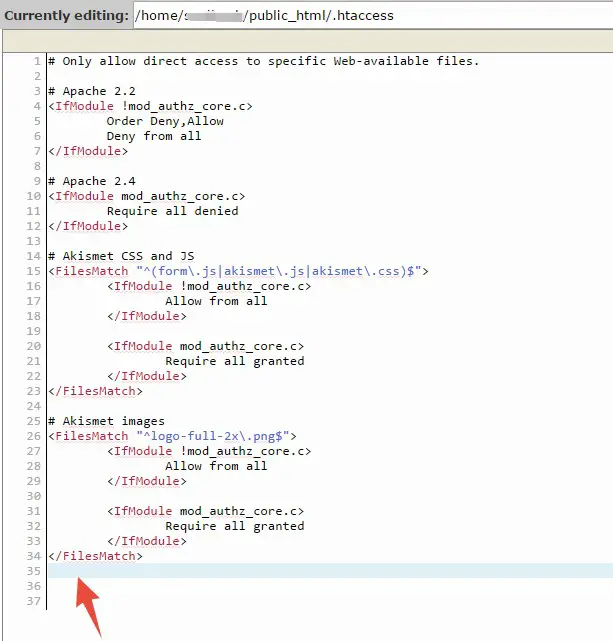
- Now as we said, you have to copy and paste another similar line on that empty place. What you are going to paste will depend on the PHP version you are going to switch to. So, it will be different for everybody. In the next step, you will find what to copy depending on your situation
- If you want to update to PHP 7.2– AddHandler application/x-httpd-php72 .php .php5 .php4 .php3
- For PHP 7.1– AddHandler application/x-httpd-php71 .php .php5 .php4 .php3
- For PHP 7.0– AddHandler application/x-httpd-php70 .php .php5 .php4 .php3
- For PHP 5.6– AddHandler application/x-httpd-php56 .php .php5 .php4 .php3
- For PHP 5.5– AddHandler application/x-httpd-php55 .php .php5 .php4 .php3
- So, copy and paste one of the lines from above to change the PHP version of your website. For example, we have pasted the line‘AddHandler application/x-httpd-php72 .php .php5 .php4 .php3’ as we wanted to switch to PHP version 7.2
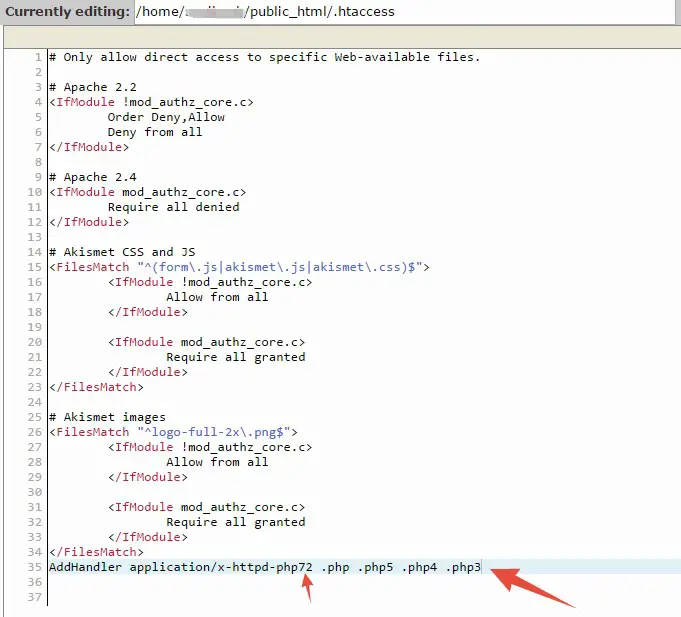
- After editing the code, click on the ‘Save’ button from the top-right corner of the screen

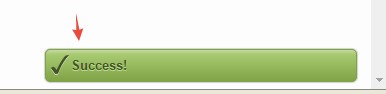
- You will see a ‘Success’ notification on the bottom-right corner of the screen
That’s it. You have changed your PHP version by editing the ‘.htaccess’ file on your cPanel.
Remark: If you see anything unusual on your website after changing the PHP version. You have to switch back to the previous PHP version to solve the problem
Summary:
We hope you can easily change the PHP version of your website from now on. As we have tried to show you two of the most effective and useful methods to do that. If you follow the guide carefully then you will be able to change PHP version of your website in future with ease.