DISCLOSURE: This post may contain affiliate links, meaning when you click the links and make a purchase, we receive a commission.
If you want to get the best out of the MySQL Database of your website, you need to know how to connect to the MySQL Database using a PHP script. After connecting you can easily perform any query from the MySQL Database. You can also display table data with the help of your MySQL database.
But before you can do any one of those, you need to know how to connect to the MySQL Database server in the first place. To solve this problem, we will show you how to do that in this article. If you are a SiteGround web host user then it will be very easy to do. Because you can take the benefit of neat and clean cPanel of SiteGround. However, if you use any other web hosts, you can follow this guide too. As most of the top web hosts provide similar functionality.
If you are not familiar with any of these, don’t worry. We will add screenshots with each step to make it easier and easy to grasp.
So, without further ado, let’s get started.
How to connect to SiteGround MySQL Database
How to find the MySQL Database information of your website?
Before you begin, you need to know some of the database information. If you have used auto script installers like ‘Softaculous’ to install the CMS on your website then you might not know the database password. If you want to know all of the information about the MySQL Database, you can follow the steps below.
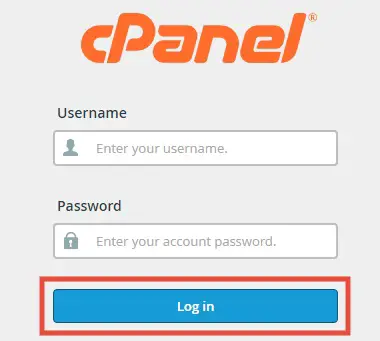
- Log in to the cPanel of your web host
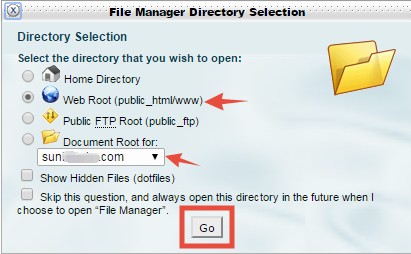
- Then navigate to the ‘Files’ section to click on the ‘File Manager’ button

- Now, a new popup box will paper. Click on the ‘Go’ button to continue
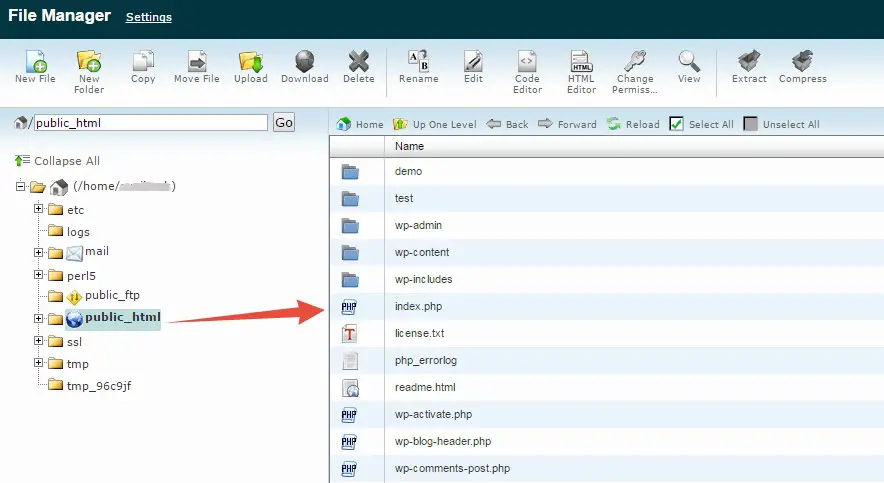
- In doing so, a new tab will be opened. Navigate to that tab and you will see all of the files of the ‘Public_html’ folder of your website on that page
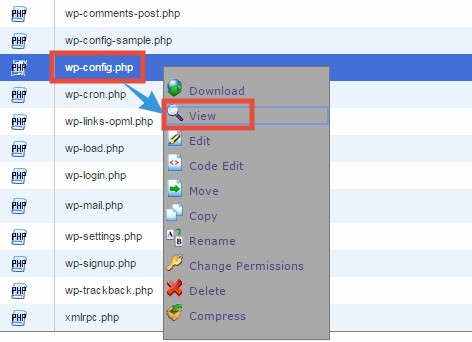
- Now, right-click on the ‘wp-config.php’ file (for WordPress sites). Then click on the ‘View’ button from the options
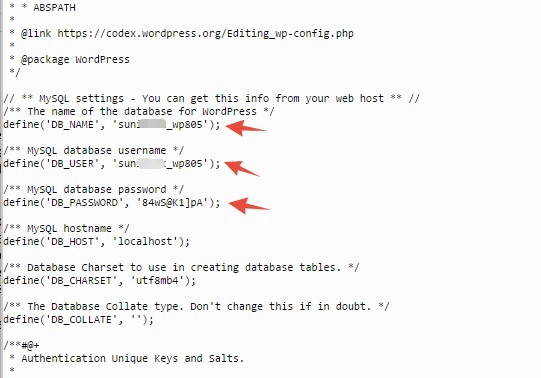
- It will open another tab on your browser. You will find all of the required information like the ‘database name’, ‘username’, and the ‘password’ on that page
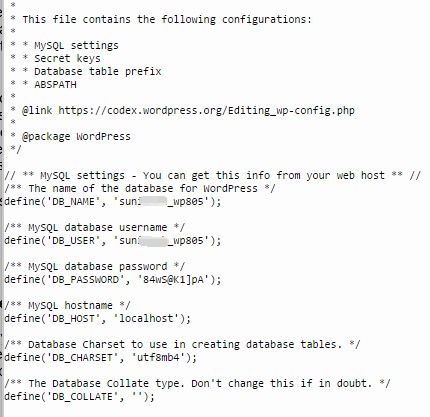
- In our case, the ‘database name’ and the ‘username’ is ‘sun_wp805’, and the password is ’84wS@K1]pA’
Now, you have to save this information for using them later.
How to create a new MySQL Database?
But, if you want to try to use another particular MySQL Database then you have to create a MySQL Database in the first place. If you know how to create a MySQL Database or have created one already, then you can skip this section. Remember, you need to keep a note of the ‘database name’, ‘database username’ and the ‘password’. You will need those if you want to connect to the MySQL Database using PHP.
But, if you don’t know how to create a MySQL Database. Then you can follow the next section where we will explain all about creating MySQL Databases in great detail. So, let’s begin.
- Log in to cPanel dashboard of your SiteGround web host account
- Scroll down to the ‘Databases’ section. Then click on the ‘MySQL Database Wizard’ button to go to the next step

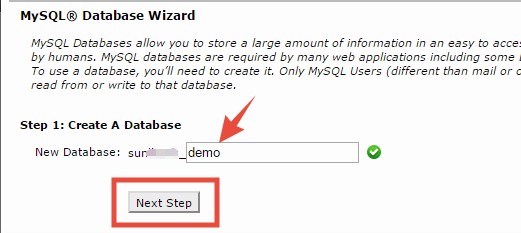
- In this Step 1, you have to create the name of the database. Enter any name on the blank box (for instance, we have used ‘demo’). Then click on the ‘Next Step’ button to continue to the next step
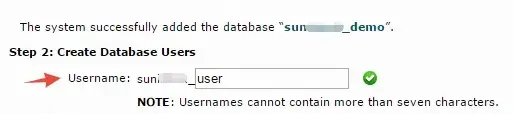
- On the next page, you have to fill in a few blank boxes with some valid information. First, enter any name on the ‘Username’ box (for example, we have used ‘user’). It will be the username which will be added to the database we have just created in the previous section
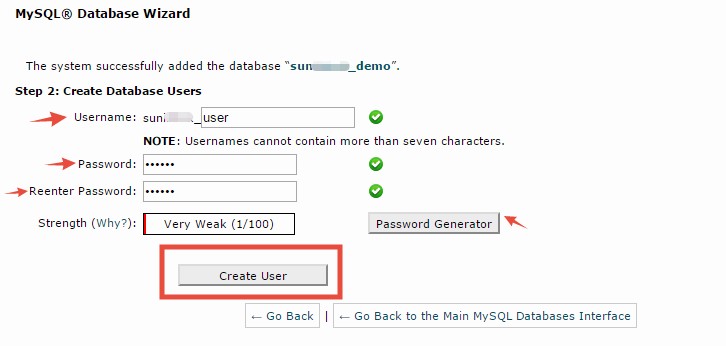
- After that, you can enter the password in the respective boxes. For the purpose of this tutorial, we have used a weak password which is ‘123456’. But, you should always use a strong password. You can use the ‘Password Generator’ button to create a strong password easily. And, most importantly, you need to save this password for using it later. We will be needing this in the next section of this article. So, copy and paste it in a safe place. Or even you can note it down on a piece of paper

- Finally, click on the ‘Create User’ button to advance
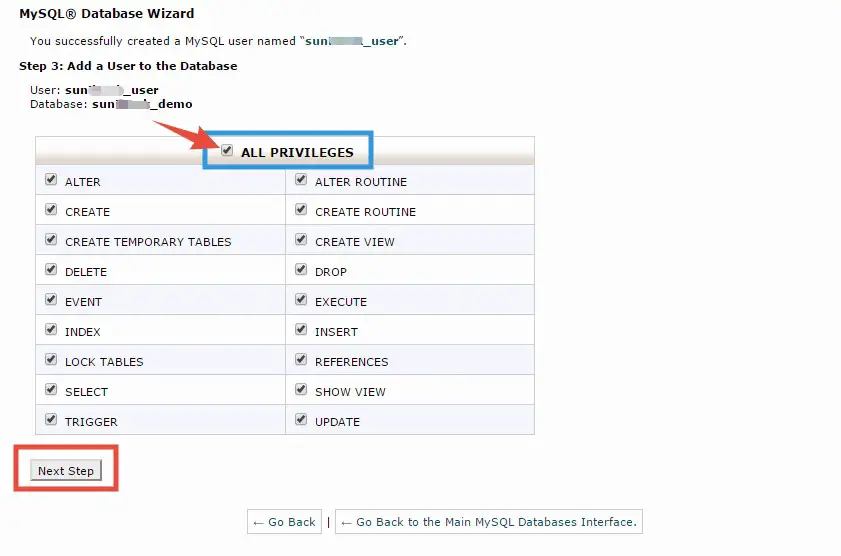
- On the next step, you have to add a check-mark next to the ‘All Privileges’ button. So, click on the ‘All Privileges’ button to add the check-mark. And, then click on the ‘Next Step’ button
- On the next page, you will see a notification saying the task is completed successfully. Plus, you will find the ‘database username’ and ‘database name’, save these two names for later use. These will be needed in the following section
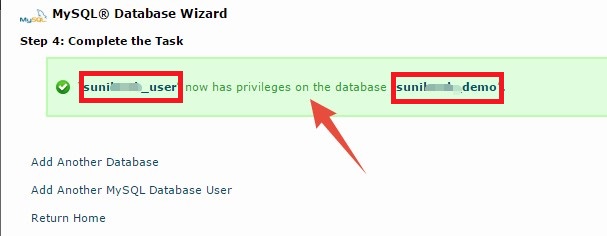
Well done. You have just created a new MySQL Database and a new database user. After that, you have added the user to the MySQL database. On top of that, we assume you have saved the ‘database name’, ‘database username’ and the ‘password’.
Now, let’s know how to use them to connect to the MySQL Database.
How to connect to SiteGround MySQL Database?
In this section, we will show you how to use a PHP script to connect to the MySQL Database. It will be very easy to follow. So, let’s jump in.
Note: You should take a backup of your website before proceeding
- Log in to the cPanel dashboard if you haven’t already
- Then click on the ‘File Manager’ button from under the ‘Files’ section
- In doing so, a new popup box will appear. Select your preferred domain name from the drop-down menu. Although, if you have only one domain connected to the hosting account then it will be selected automatically. Also, make sure that the ‘Web Root (public_html/www)’ is selected. Now, click on the ‘Go’ button
- After doing that, a new tab will open on your browser. Go to that new tab, you will see all of the folders on the left side of the screen and on the right side you will find all of the files from the ‘public_html’ folder
- Now, you have to create a new PHP file on that ‘public_html’ folder. To do that, click on the ‘New File’ button from the top-right corner of the screen
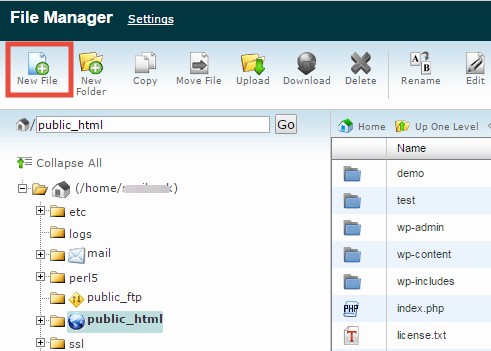
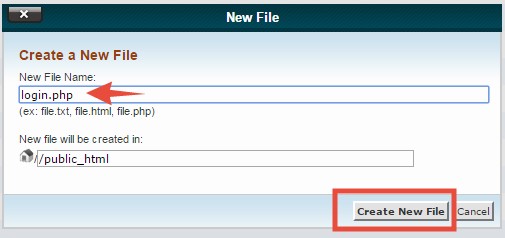
- Another popup window will appear, you have to give the file a name. To do that, type any name on the blank box under the ‘New File Name’ section. You have to add the ‘.php’ extension to the file name. For example, we have named the file as ‘login.php’. After that, click on the ‘Create New File’ button to proceed
- After that, you will find that the file is already created in the ‘public_html’ folder. Now, we have to edit this PHP file
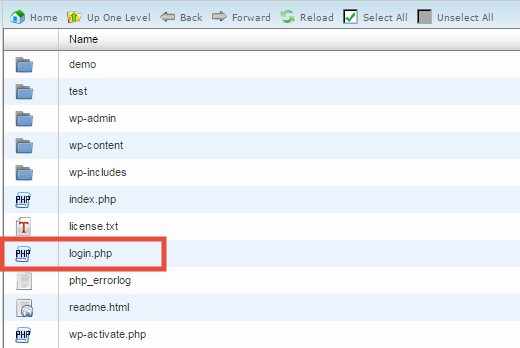
- So, click on the file you created (in our case, ‘login.php’) to select it. Then click on the ‘Code Editor’ button from the top menu bar

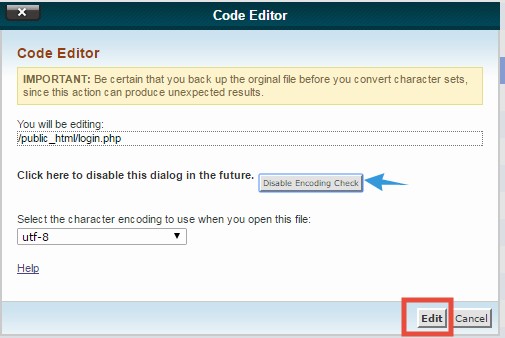
- That will bring a new popup window. It is normal. Optional: If you don’t want to see this popup window in future, then click on the ‘Disable Encoding Check’ button. After that, click on the ‘Edit’ button to proceed
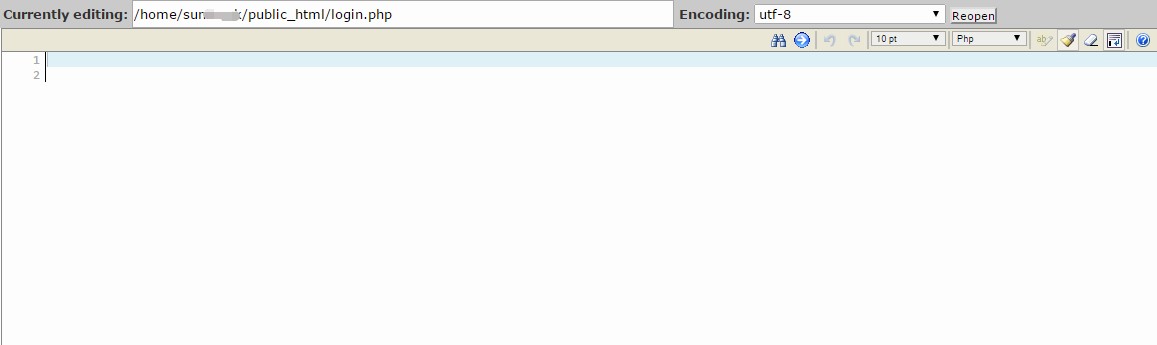
- It will open a new tab on your browser. You will see a blank page on the new tab. Do not worry about that. We will talk about it next
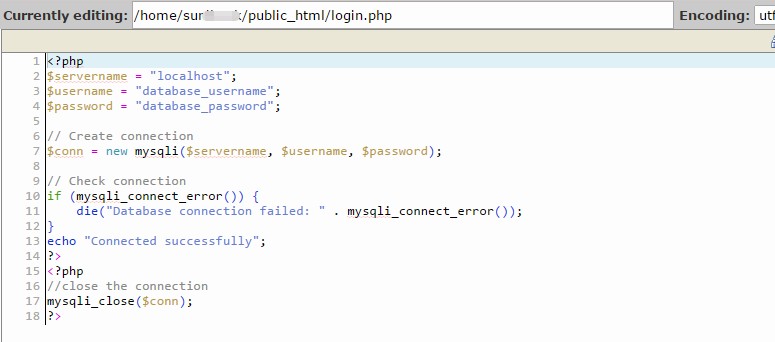
- Now, you have to copy the script from below and paste it on this blank page. Remember to paste it on the line number 1. Here is the script:
<?php

$servername = "localhost";

$username = "database_username";

$password = "database_password";
// Create connection

$conn = new mysqli($servername, $username, $password);
// Check connection

if (mysqli_connect_error()) {

die("Database connection failed: " . mysqli_connect_error());

}

echo "Connected successfully";

?>
<?php

//close the connection

mysqli_close($conn);

?>

- Paste the script
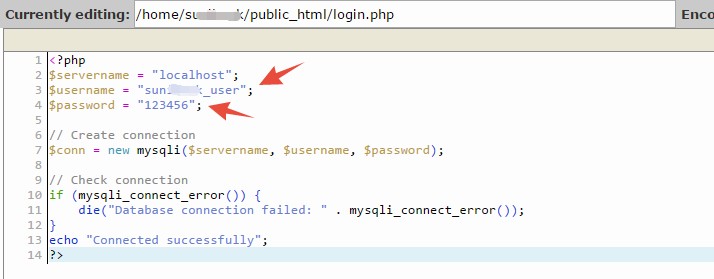
- Now, you have to replace the part ‘database_username’ with the actual database username of yours. And also, you have to replace the ‘database_password’ part with the actual password of your database. That’s why we told you to save the ‘database username’ and the ‘password’ when you created the database in the first section. You don’t need to change anything other than these two lines

- Use your Database username and password

- After changing these lines, it will look like the image below. In our case, the username is ‘sun_user’ and the password is ‘123456’. But, it will be different for you. So, replace the data carefully

- After changing the script
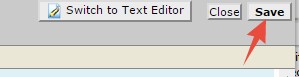
- When you are done, you should double-check all of the information if they are correct. If you are content with everything, click on the ‘Save’ button from the top-right corner of the screen to save the script

- ‘Save’ button
- You will see a ‘Success’ notification in the bottom right corner of the screen which means the changes were successfully saved

- ‘Success’ notification

- Now, from your browser, go to ‘yoursite.com/login.php’ (replace ‘yoursite’ with your actual domain name and ‘login’ with your actual PHP file name). We have used ‘login.php’ because the PHP file we have created was named ‘login’. So, if you have used any other name, type that instead on the address bar of your browser. To make it clearer, if you have named the PHP file as ‘newfile’ then you have to type ‘yoursite.com/newfile.php’. The ‘.php’ extension is a must. We hope now, it will be easier for you to comprehend

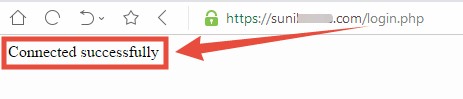
- Go to ‘yoursite.com/login.php’
- After that, you will see a notification on the next page saying ‘Connected successfully’. It means that you have made a successful connection to the MySQL database using a PHP script

- ‘Connected successfully’
Note: After connecting to the MySQL Database if you see that your website has crashed. Then you should delete the PHP file you have created
To sum it up:
So, You have established the connection to your MySQL Database. Now, you can take the benefit of the MySQL Database using other PHP functions. If you can’t establish the connection, then you will see an error message like ‘Database connection failed!’ It will happen if you have used incorrect connection details. So, it’s better to check if the password and the database username you have provided are correct in the script. That’s all for this tutorial.