
DISCLOSURE: This post may contain affiliate links, meaning when you click the links and make a purchase, we receive a commission.
Have you ever thought about this?
Whenever we visit a website for the first time what do we notice up front? Yes, you guessed it right. The design of the website become noticeable before anything else.
As you may already know that the outlook of any website depends on the theme it’s using. So, it is very important to use a top-notch theme on your website. Eventually, if the design of the website is not pleasant or professional then the visitors won’t be returning to your website.
Thus, if you want to keep the visitors coming to your website. You need a theme which is likable and professional. But, prior to choosing a good theme, you need to know how to install a theme in the first place. So, if you are a SiteGround web host owner and at the same time use ‘Drupal’ as a CMS (Content Management System) on your website. Then you have come to the right place.
Because today, we are going to share some effective methods of installing a ‘Drupal’ theme on a SiteGround web host. This article will be a step by step by guide where we will describe multiple methods part by part. For your convenience, we will also attach screenshots with each of the steps.
So, without spending more time here, let’s get to the good part.
Read: Top Drupal Hosting
How to Install Drupal Theme on SiteGround
Automatic Method:
As usual, we will explain the automatic method first. As it is very easy to follow for everybody. Also, this method can save a lot of your valuable time. So, here we go.
Part 1. Downloading a ‘Drupal’ theme from the SiteGround official website:
First and foremost, you need to download a theme which is compatible with ‘Drupal’. There are literally thousands of ‘Drupal’ compatible themes available online. Some of them are free and others are paid. You can download any theme from anywhere you want to.
But, if you don’t know any reliable source, then you can download from the official SiteGround ‘Drupal’ theme repository. SiteGround provides all of the themes for free. So, you can try one of them. In this article, we will also use a theme from SiteGround. So, let’s see how to download a theme from the SiteGround official theme repository at first.
- Go to this link from your browser
- You will find a number of some awesome themes on that page. You can choose any one of these themes from that site
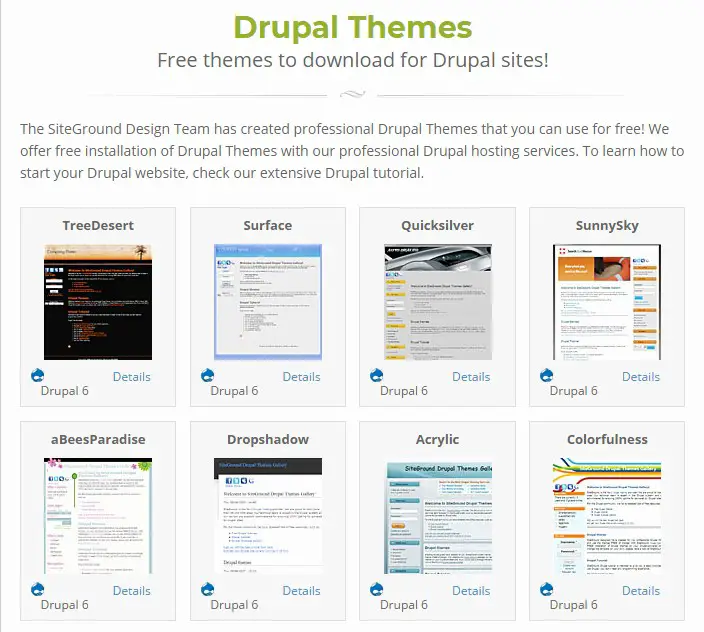
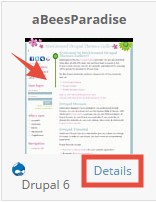
- So when you have chosen a theme click on the theme directly or click on the ‘Details’ button to proceed
- In doing so, a new pop up will appear in the screen. You can preview this theme in action by clicking on the ‘View Demo’ button. You don’t have to download the theme to see a live demo of the theme. So, it is a great way of testing the theme before even downloading it
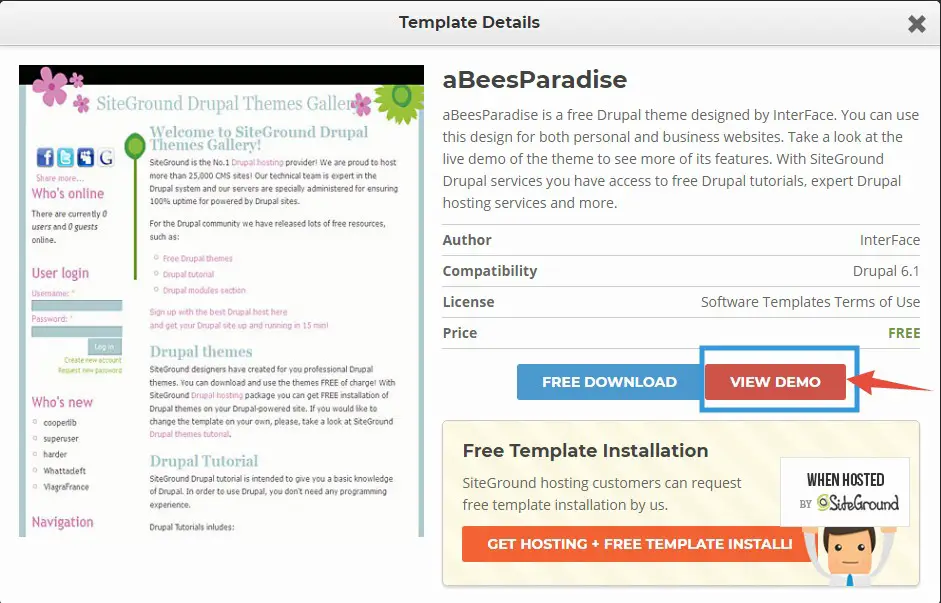
- After that, if you want to download the theme, you have to click on the ‘Free Download’ button

- On the next page, you have to provide some information to get the download link of the theme. So, enter information like ‘First Name, Last Name, Email, Website URL, Validation Code’ etc. Remember to use a valid email address because the download link will be sent to the email address which you will provide here
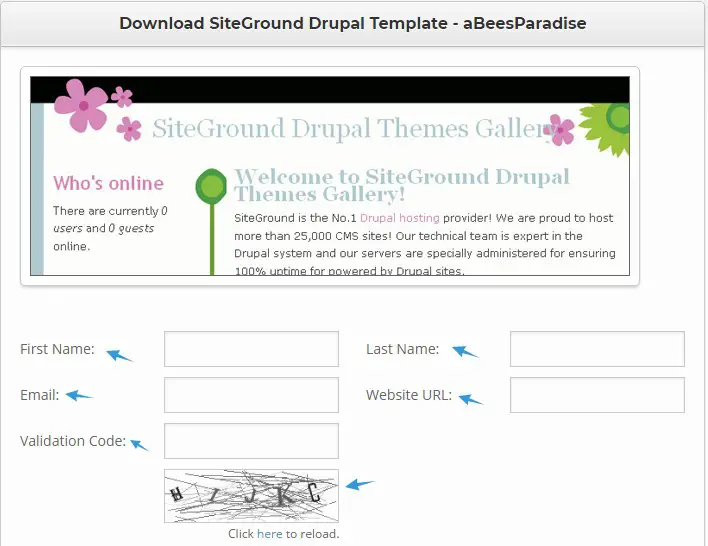
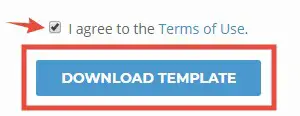
- Lastly, add a check-mark before the ‘I agree to the Terms of use’ button and click on the ‘Download Template’ button
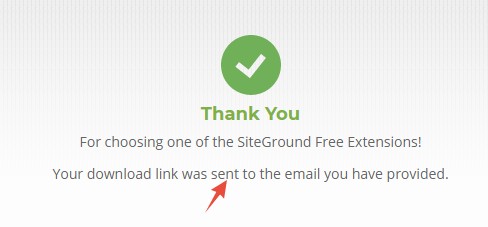
- By doing that, you will be taken to a new page, where you will come to know that the download link was sent to the email address you have provided
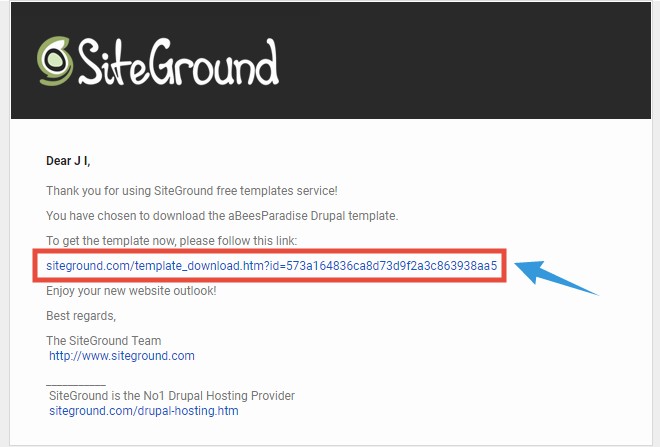
- So, sign in to your email account where the download was sent to. You will notice that you have received an email from ‘SiteGround’

An email from ‘SiteGround’ - So open that email. Then you will find the download link inside the email. So, click on the download link

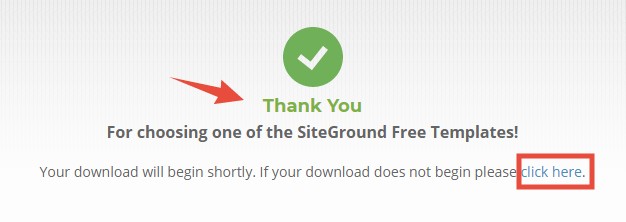
- That will open a new tab and your download will start automatically. However, if the download doesn’t start, you can click on the ‘Click here’ button to start it manually
- The download will be completed shortly. The theme file will be downloaded in ZIP format
At this moment, you have downloaded the theme package. Now, you have to upload it to the backend of your ‘Drupal’ website. We will explain how to do that in the next part.
Part 2. Upload the theme file using Drupal’s built theme uploaded:
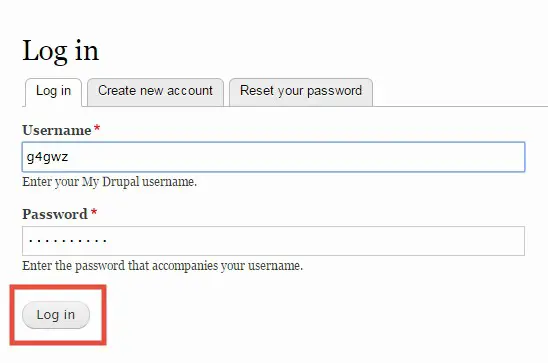
- Log in to the admin panel/dashboard of your ‘Drupal’ website. The ideal structure of the ‘Drupal’ admin panel URL is like ‘yoursite.com/user/login’. Just replace the ‘yoursite’ part with your actual domain name
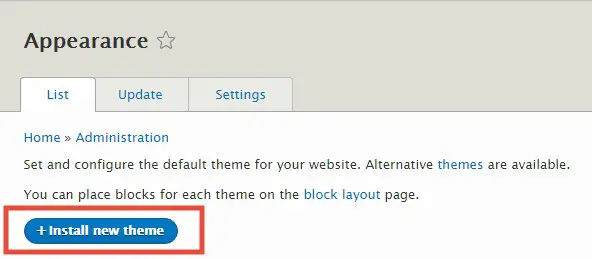
- Now, when you are on the ‘Drupal’ dashboard, click on the ‘Appearance’ button from the top bar

- Then on the next page, click on the ‘Install new theme’ button to continue to the next step
- On the following page, you will know that there are two options available to upload a theme
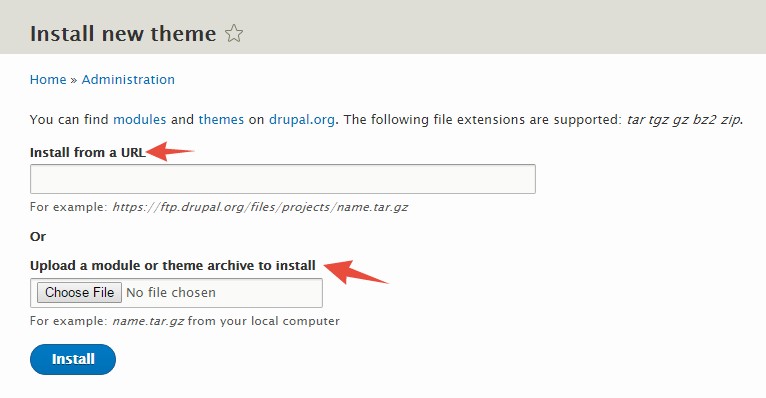
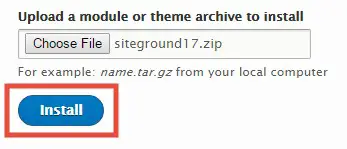
- As we have already downloaded the theme. We will use the second option which is ‘Upload a module or theme archive to install’. So, click on the ‘Choose File’ button and then upload the theme file which you have downloaded during the previous part
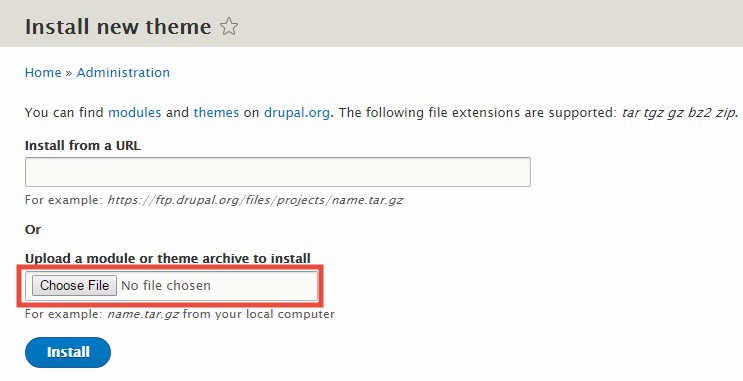
- After that, click on the ‘Install’ button from the bottom and wait for the upload to be completed. The time will depend on the size of the theme
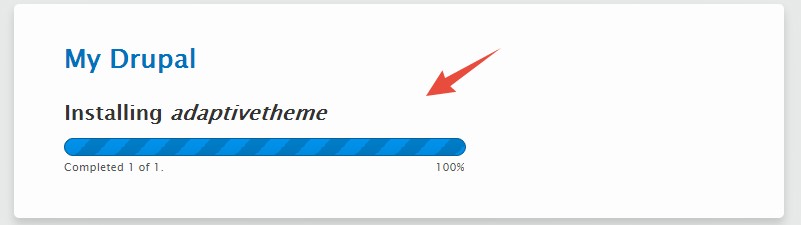
- You will see a progress bar which will indicate the completion of the installation process
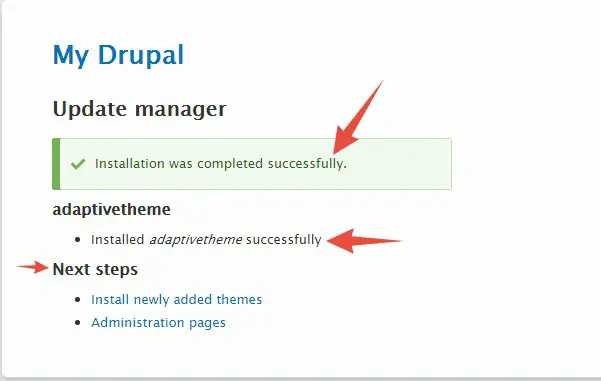
- On the next page, you will see a notification saying that the installation was completed successfully
Part 3. How to use a new theme as the default one on Drupal:
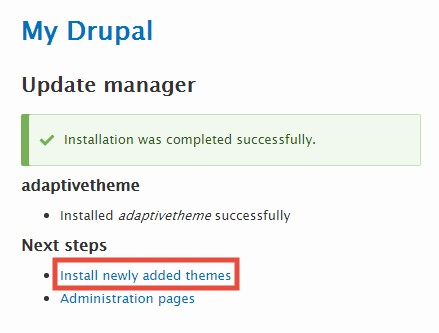
- After the previous step, click on the ‘Install newly added themes’ button from under the ‘Next Steps’ section
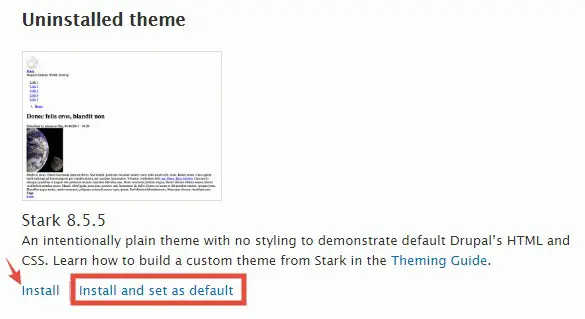
- After that, you will find the newly added theme under the ‘Uninstalled Themes’ section on the next page
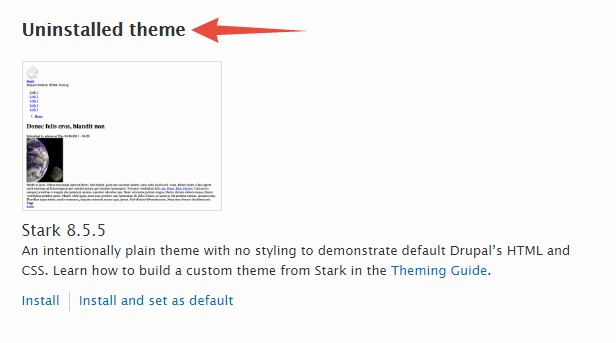
- You will discover that there are two options under the theme. So, if you want to just install the theme for the time being then click on the ‘Install’ button. But, if you want to make it the default theme after installing it right away. Then click on the ‘Install and set as default’ button
- Shortly, after that, you will see a notification saying that the particular theme is the new default theme of your website

Optional Steps:
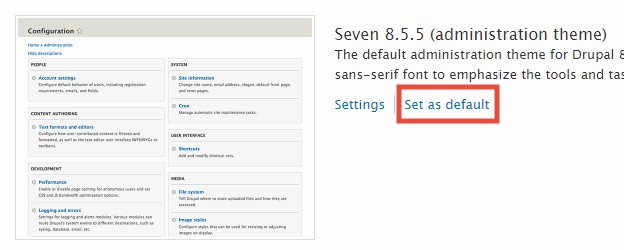
- If you happen to just install the theme then you can click on the ‘Set as default’ button to make it the new active theme on your website
- If you want to customize the theme then click on the ‘Settings’ button from under that particular theme
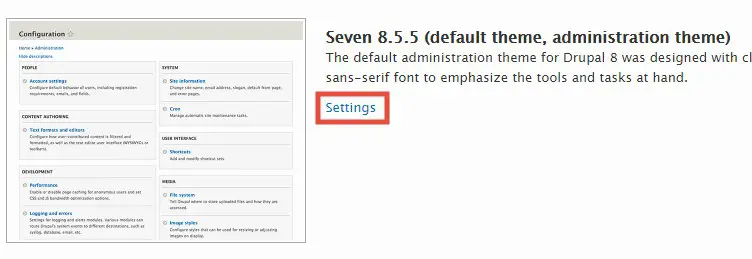
- After you are satisfied with everything, click on the ‘Save Configuration’ button from the bottom of the page

- On the next page, you will see a notification saying that the configuration options are saved

Manual Method:
How to upload the theme via cPanel manually:
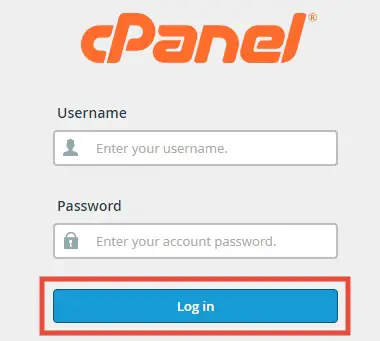
- Login to cPanel of your SiteGround web hosting account
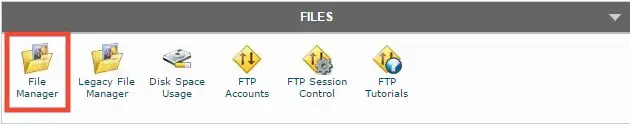
- Now, click on the ‘File Manager’ button which will be under the ‘Files’ section
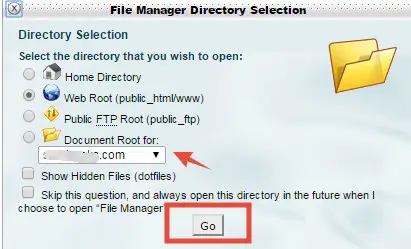
- After doing this, you will see a window pop up. First, select the appropriate domain name from the drop-down menu. If you have only one domain then it will be automatically selected. Then click on the ‘Go’ button to proceed
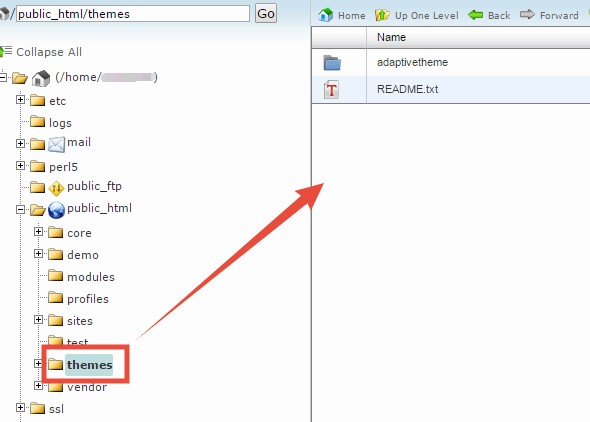
- A new tab will be opened. On the new tab, you will find the ‘public_html’ folder has opened. It is the default directory/folder where the Drupal CMS was installed. On the right-hand side, you will find all of the files of the ‘public_html’ folder
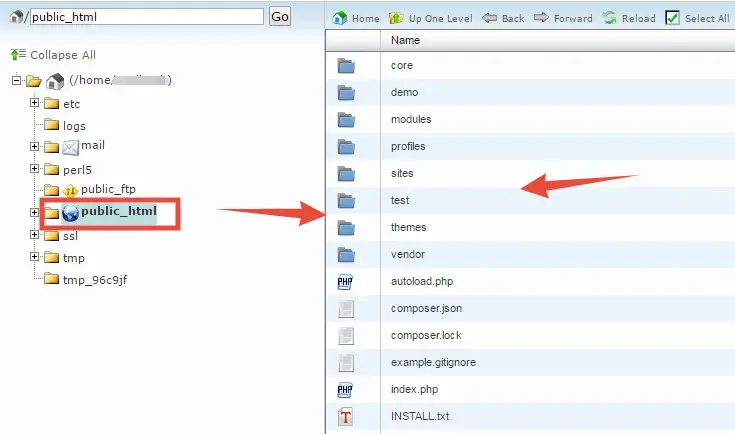
- We have to upload the theme to the ‘themes’ folder. So, double-click on the ‘themes’ to open the folder
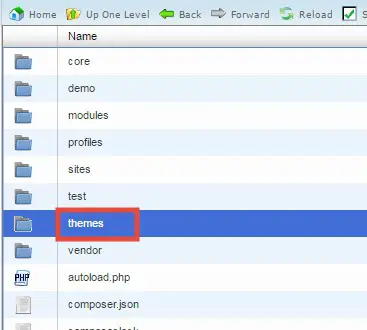
- If you have other themes installed already then you will see those themes are inside this ‘themes’ folder already
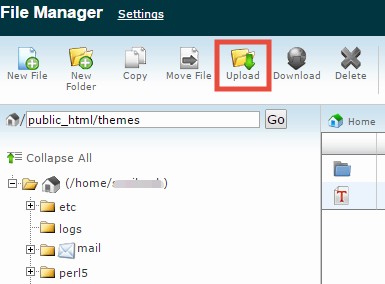
- After opening the folder, click on the ‘Upload’ button from the top menu
- In doing that, another new tab will open. Click on the ‘Choose File’ button and upload the theme file which you have downloaded in the first place

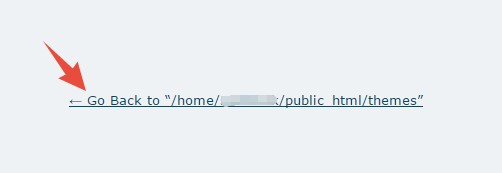
- You will see a notification on the bottom right corner of the screen about the completion of the upload

- When the upload is completed, click on the ‘Go Back to ‘’/home/…’ link from the middle of the page to return to the previous page
- You will find the theme in ZIP format on that folder. So, you have to extract the Zip file at first
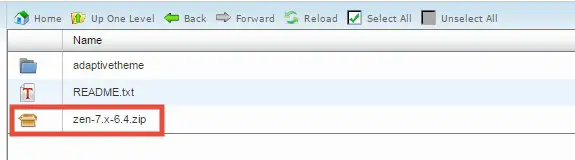
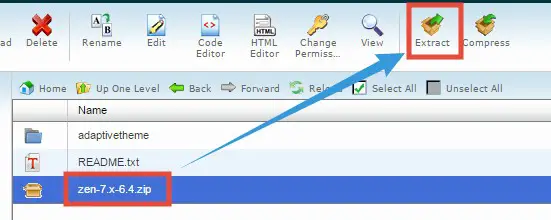
- So, click the theme to select it. Then click on the ‘Extract’ button from the top of the screen
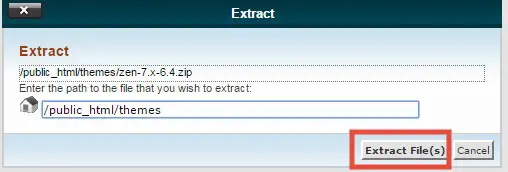
- Another popup window will appear. Click the ‘Extract File(s)’ button to close it
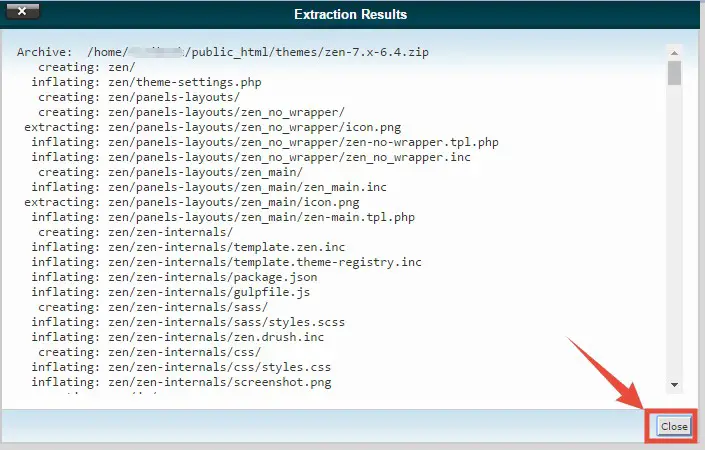
- When the extraction is completed, a new popup window will be visible. Click on the ‘Close’ button to complete the extraction process
- With the previous step, you have uploaded the theme file manually. Now, you have to just activate the theme by following the 3rd part of the ‘Automatic Method’ where we have discussed the process of making a theme active/default on your website
How to upload the theme file using FTP clients:
If you couldn’t upload the theme file using any of the previous methods. Then you should use this step. However, we don’t recommend this method to the beginners. As you need to learn about FTP clients in great detail before trying this method. You can use this method as a last resort. So, let’s go.
- Download any FTP client software. We recommend FileZilla. You can download any other
- Then connect the web server to your PC via the FTP client software
- Then browse to the ‘themes’ folder of your ‘Drupal’ website
- Upload the theme file inside the ‘themes’ folder from your PC
- Then you have to activate the theme from inside the ‘Drupal’ dashboard. You can follow the 3rd part of the first method of this article to do that
Summing it up:
The theme is one of the most important parts of a website. So, if you haven’t set up a theme on your Drupal website. You will be able to do it by following this guide. So, install the theme then redesign your website and give it a fresh look. We hope this article will help you to install a new ‘Drupal’ theme on a SiteGround web host.