DISCLOSURE: This post may contain affiliate links, meaning when you click the links and make a purchase, we receive a commission.
So, you have just bought your first domain and hosting account. The feeling is amazing.
You have chosen ‘Joomla’ as the content management system (CMS), you are going to use on your website. Everything was OK until you entered into your cPanel.
Read also: Top Joomla Hosting
You have drowned in the ocean of the huge number of different settings on the cPanel. Now, you are stuck. You don’t have any idea what to do. Even a wrong click can make a lot of mess in there. And, your excitement has started to fade.
Don’t worry, we have got your back. We have made this article especially for the persons who are struggling to install ‘Joomla’ on their ‘Siteground’ web hosting account. So, if you are one of them. It’s time to knock up all of your fears out of the park.
By the time you are done reading it, you will know how to install ‘Joomla’ on your ‘Siteground’ account in multiple ways. And, it doesn’t matter if you haven’t got any experiences in this field.
So, let’s start without wasting more time.
Table of Contents
How to Install Joomla on SiteGround
At first, we will cover a simple method to install ‘Joomla’. In this method, you will be able to install ‘Joomla’ directly from within the cPanel. Let’s see how this works.
For your convenience, we will divide this method into two parts.
- Going to the ‘Joomla Installation Page’
- Installing from there
Method One – Install ‘Joomla’ via cPanel
First Part:
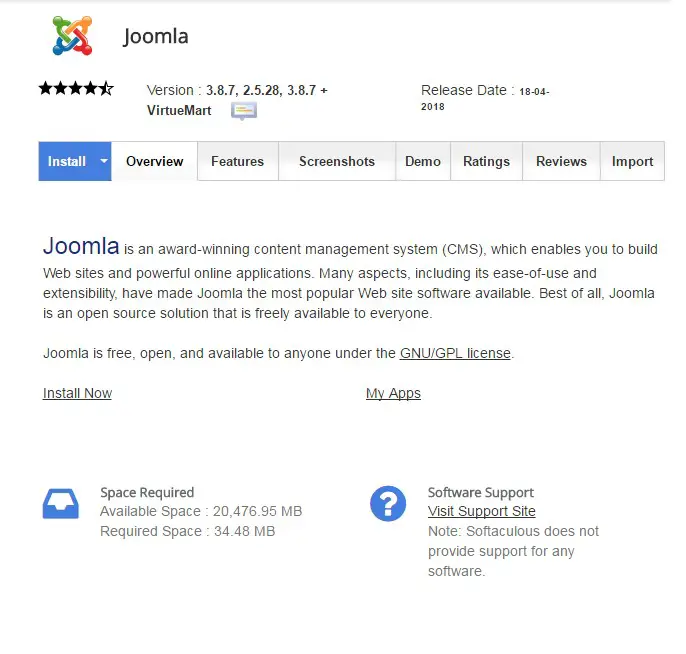
You have to go to the ‘Joomla Installation Page’ (see the image above) from where you can easily install ‘Joomla’ in your ‘Siteground’ web host. You can go there in 3 different ways from within your cPanel.
In the next section, we will cover all of the 3 ways to get to the ‘Joomla installation page’. And later we will tell you how to install ‘Joomla’ from that installation page.
Note: You can use any one of these 3 methods. Whichever you like.
Before you start:
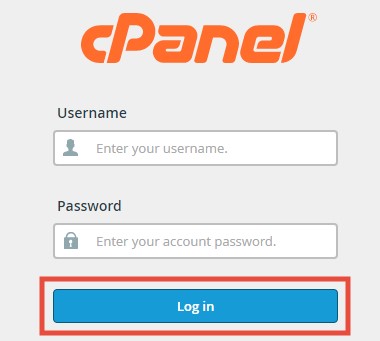
- You need your cPanel username and password to log in
- You need to have a domain name which is connected to your hosting account
1st method:
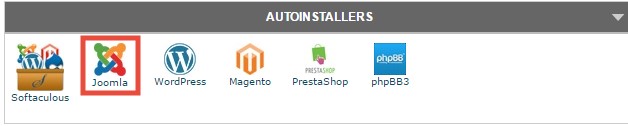
As you have just logged into your cPanel. Click on the ‘Joomla’ button which you will find under the ‘Auto Installers’ tab. After that, you will be redirected to the ‘Joomla installation page’.
2nd method:

After logging in to your cPanel, navigate to the ‘Joomla! Tools’ tab. There you will find an option named as ‘Joomla Installer’. Click on it to get to the ‘Joomla installation page’.
3rd method:
This is a popular method. Here we will let you know the use of an auto script installer known as ‘Softaculous’. You will find it on your cPanel. Let’s know how to use ‘Softaculous’ to go to the ‘Joomla installation page’.
- First of all, log in to your cPanel with your username and password
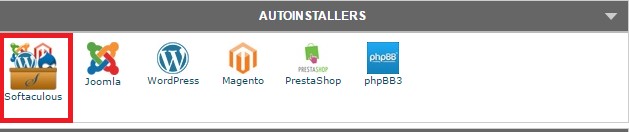
- Next click on ‘Softaculous’ app installer. You will find the ‘Softaculous’ installer under the tab ‘Auto Installers’
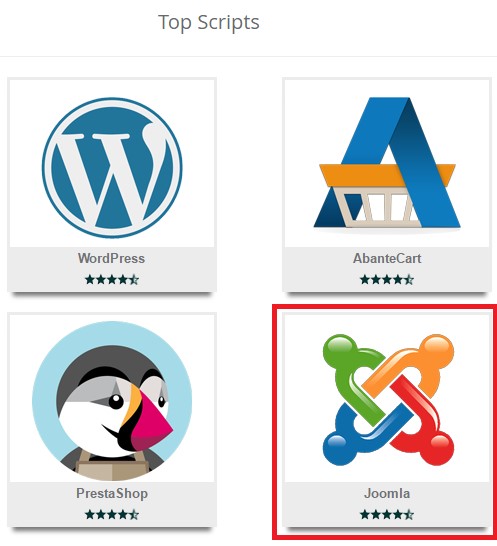
- In the next page, from the ‘Top Scripts’, click on ‘Joomla’
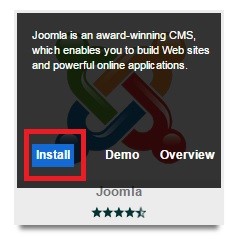
- Or you can hover your mouse pointer over ‘Joomla’ and you will see ‘Install’ Click on to that to proceed
- Then you will find the ‘Joomla installation page’ on the next page
Congratulations, we believe that you have arrived at the ‘Joomla installation page’ by following any of the 3 methods. Now is the time to install ‘Joomla’ on your ‘Siteground’ host.
And, this is similar for everybody, whatever the method you have used to reach to this page doesn’t matter.
We will let you know the whole process in step by step down below.
Let’s begin.
Second Part:
Installing ‘Joomla’ the easy way:
- From the installation page, you can choose between either a ‘Custom install’ or ‘Quick Install’. However, we will recommend the ‘Custom install’ as you will have more control over the whole installation process using this option.
On a side note:
If you choose quick install you will find only 2 settings to customize named as ‘Software Setup’ and ‘Admin Account’
But if you choose ‘Custom install’ you will find 5 settings to modify named as ‘Software Setup’, ‘Site Settings’, ‘Database Settings, ‘Admin Account’, ‘Choose Language’.
Also, you will be able to customize some ‘Advanced Option’ if you want to. And that is why we recommend this option.
Also, the ‘Custom install’ cover both of the settings from ‘Quick install’. So, we are only going to tell you about the ‘Custom install’
- To access the ‘Custom install’ just click on the blue ‘Install’ button. Or you can click on the down-arrow beside the ‘Install’ button and choose the ‘Custom Install’ option from there.

‘Custom Install’ settings:
Here you can modify a number of settings. Let’s start.
Software setup:
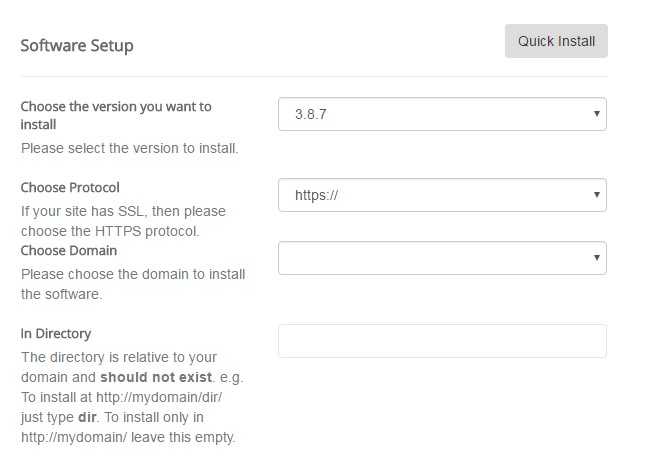
- At the first box, you can select which version of ‘Joomla’ you want to install. Always, chose the latest version. In our case, we have selected 3.8.7 version. Select yours from the dropdown menu
- On the next box, you can choose the protocol of your site. You can choose from 4 options from the dropdown menu. If your domain name comes with SSL, then choose HTTPS protocol. If yours doesn’t have SSL then go with HTTP.We recommend choosing either the ‘https://’ or the ‘http://’. You don’t have to choose the protocol with the additional www. In our case, we have selected the ‘https://’ protocol.
- On the next box, you can choose the domain name of your website. If there’s more than one choose from the drop-down Or if there’s only one this will be selected by default
- You can keep the next box ‘In Directory’
Site Settings:
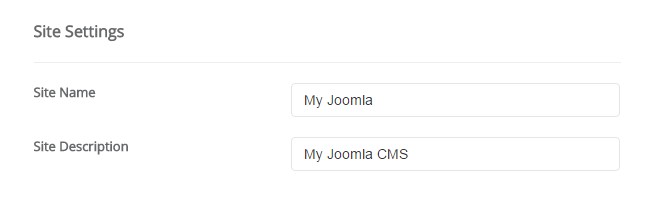
- On the first box, you have to type your site’s name
- And on the second box type the description of your site. It could be the tagline/slogan of your site
Database Settings:
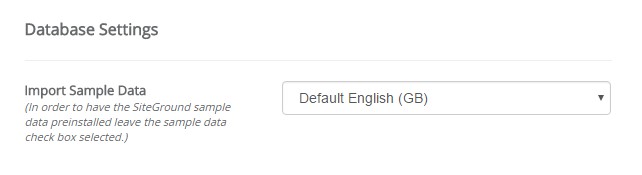
- This section has only one setting to be modified which is ‘Import Sample Data’. You can leave this section untouched as the default setting is OK and it is already selected
Admin Account:
This is an important section. You should note down all of this information for later use. This information will be needed when you will log in to your site later. So, please note them or take a screenshot. And keep it in a safe place.
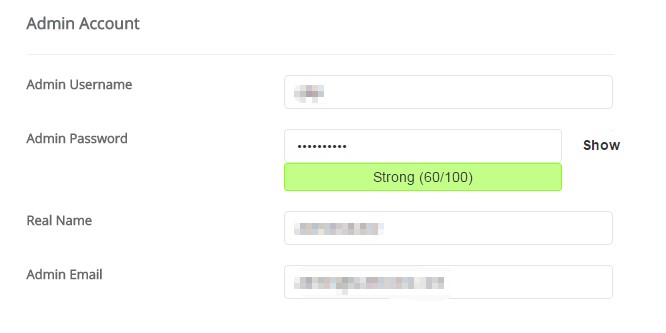
- On the first box, you have to type the ‘Admin Username’. You can type any name here. But, we recommend that you don’t type anything generic like ‘Admin’ or Administrator’ as it will be easy to guess for the hackers to hack your account. Whatever you choose, note it down
- Next, you have to set the password of your account. There will be an auto-generated password. You can keep as it is. Or you can also modify it however you want to. Again, save the password in a safe place.
- Then on the ‘Real Name’ you can give your real name or leave it as it is
- The in the ‘Admin Email’ box you have to type the email where you want to get all of the admin related notifications in the form of emails.
Choose Language:

- It’s self-explanatory. On this section, you can select the language of your ‘Joomla’ administration panel. We have kept it to ‘English’. You can select yours from the drop-down menu
Advanced Options:
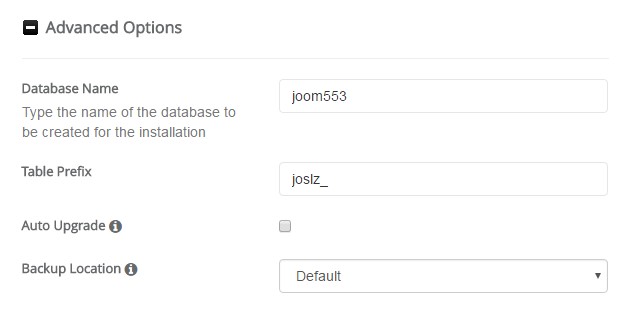
In this section, you don’t have to change anything. It is better to keep everything at default settings. However, we recommend saving all of the information of this section. Because it may come in handy later anytime.
Install:
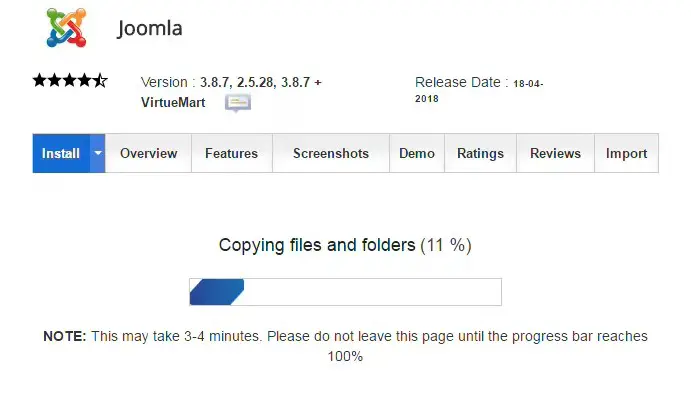
After you are satisfied with all of the settings, information etc. You can click on ‘Install’ button to start the installation process. The installation process will take just about a minute or two.
Caution: Do not leave this page until the installation is done
- When the installation process is completed. You will see a ‘Congratulations’ message along with your ‘Joomla Administrator URL.’

- Now, go to that URL to find the login screen of your ‘Joomla’ admin panel.
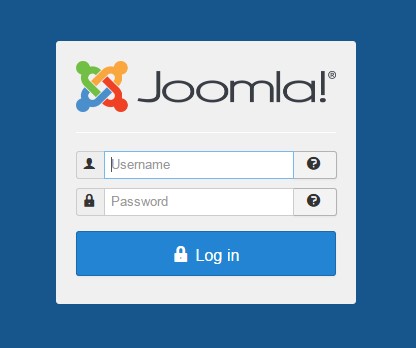
- To log in just enter the username and password you have chosen during the installation process and click on ‘Log in’. And, you will be on the admin panel of your ‘Joomla’ based site.
Now give a pat yourself on the back and enjoy your new site.
Method Two – Install ‘Joomla’ manually
At this point, we are going to discuss the method of installing ‘Joomla’ on a web server manually. To be honest, this process will take more time than the previous one and also it is more complicated. This method also has multiple steps to be performed.
Fear not!
We will let you know every step in as detailed as possible.
The steps are:
- Creating a MySQL database
- Downloading and uploading ‘Joomla’’ installation file
- Finalizing the installation
1st Step:
In this step, you are going to create a MySQL Database on your ‘Siteground’ host. It is very easy to create. Let’s do it.
Creating a MySQL Database:
- Log in to your ‘Siteground’ cPanel
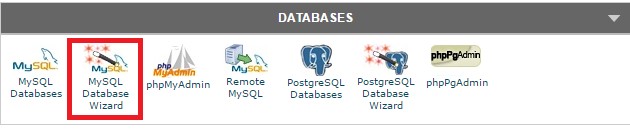
- Navigate to the ‘Databases’ There you will find ‘MySQL Database Wizard’, click on it
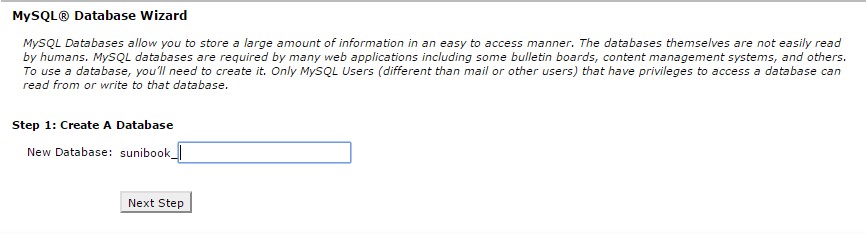
- On the next page, you will create a database. So, type any name which you want to use as the new database name. After that, click on ‘Next Step’
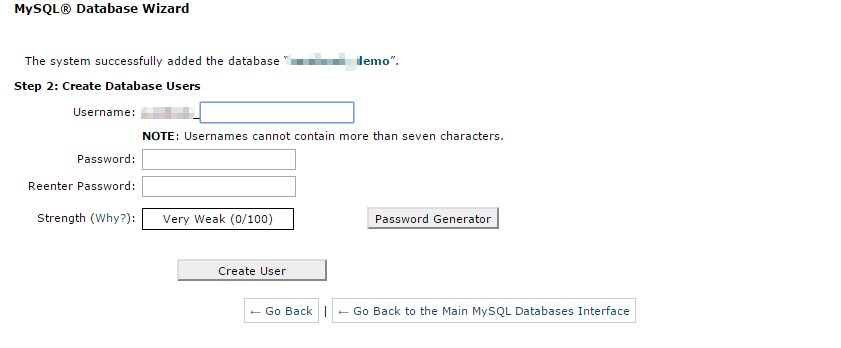
- On the next page, you will create a database user. You have to also type in the username and password on the blank boxes. Remember that you have to save the username and password in a safe place for using them later. Then, click on ‘Create User’
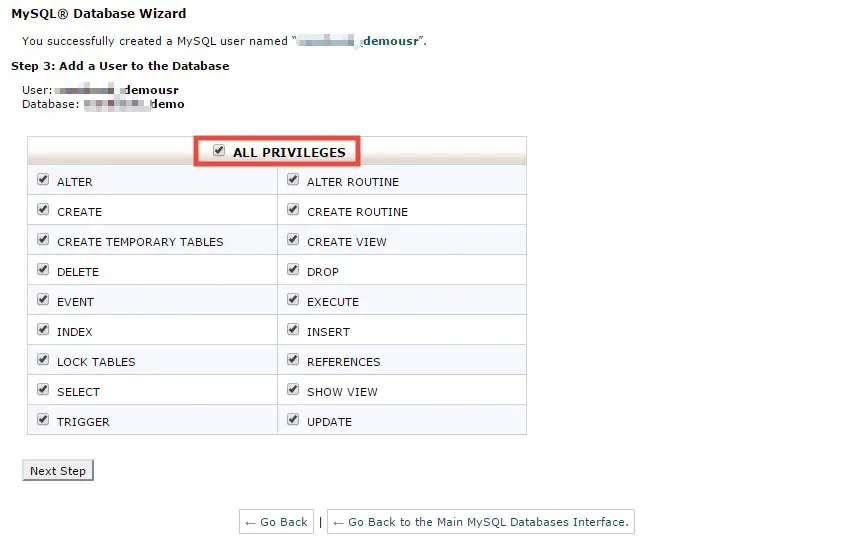
- On the final step, you will add the user to the database. To do that, tick mark on the ‘All Privileges’. Then click on ‘Next step’ to continue
- You will find that you have successfully created a new ‘MySQL Database’
2nd Step:
As you have already created a database, now we are going to download and upload the Joomla installation file.
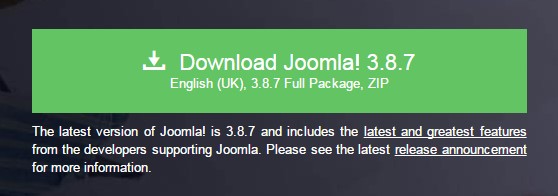
- First, you have to download the latest version of ‘Joomla’ on your PC. So, download it in zip format.
Then you have to upload it to your web host. You can do it in many ways. But we will tell you the easiest way to do that.
Uploading the ‘Joomla’ file to ‘Siteground’ web host:
- Log in to your ‘Siteground’ cPanel
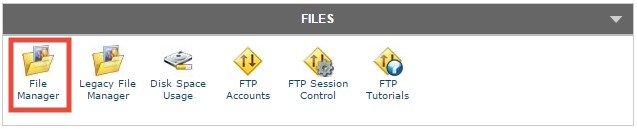
- Go to the ‘File Manager’ which will be under the ‘Files’ tab
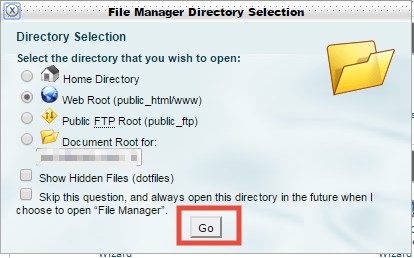
- Then a pop-up will come. Click on ‘Go’ to proceed
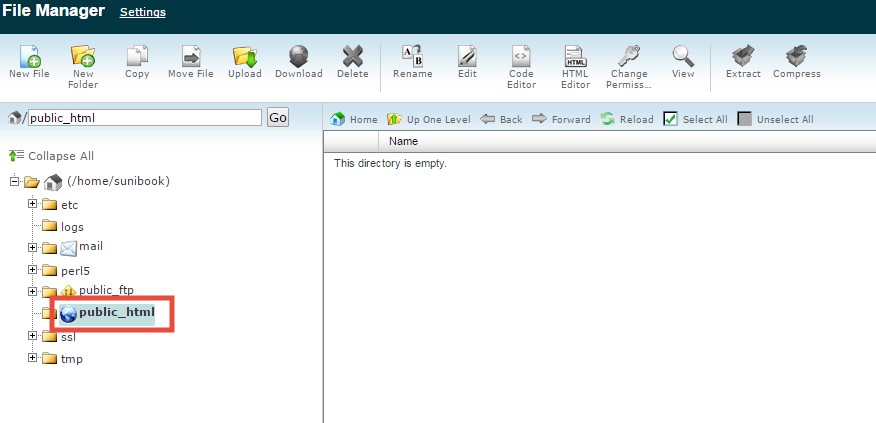
- Next click on ‘Public_html’ from the left pane on the next page
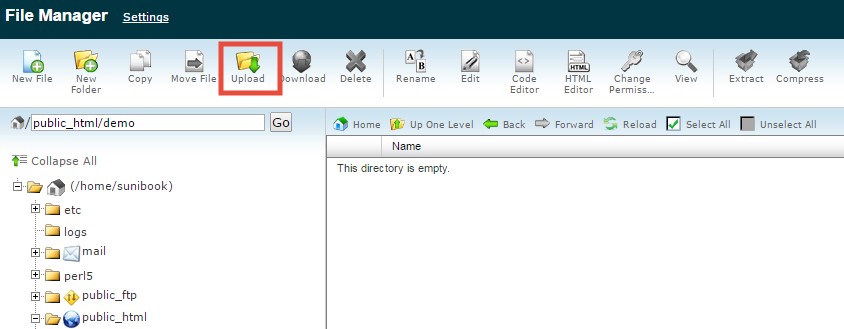
- Now click on ‘Upload’ on the same page from the top menu. It will open in a new tab on your browser
On the new tab, click on ‘Choose File’ and browse to that folder where you just downloaded the ‘Joomla’ zip file. Select the ‘Joomla installation’ file to upload. The upload duration will depend on your internet speed.
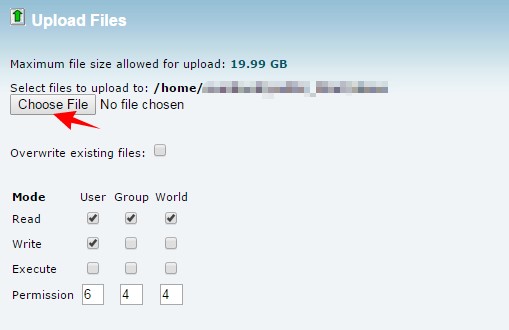
Note: Do not close the window until the upload is finished
- Once the upload is completed, go to the previous tab where you just uploaded the file
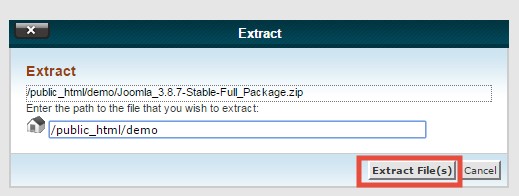
- There click on the file you just uploaded to select it (if you don’t find the file, just refresh the page). Then click on ‘Extract’ from the top menu to extract the zip file

- A popup will appear, just click on ‘Extract’ to continue. The extraction will take less than a minute
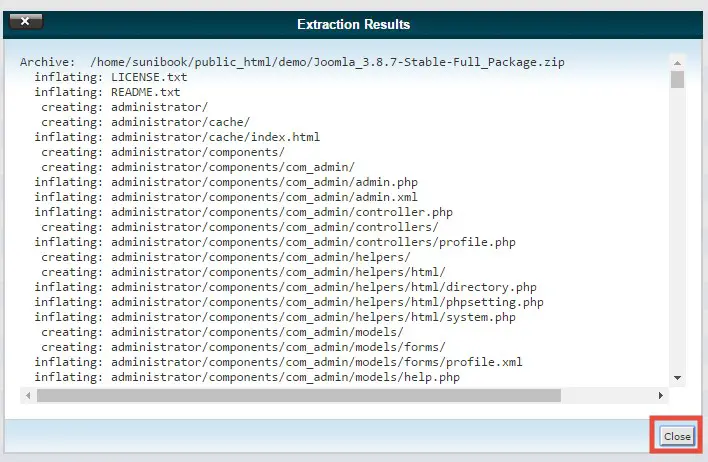
- After the extraction is completed, another pop up will appear with the extraction result. Click on ‘Close’ to proceed
3rd Step:
So far you have created the database (1st step) and uploaded the ‘Joomla’ installation file into your web host account (2nd step). Now is the time to tie them together. Let’s see how to do them.
- Go to your site from your browser. If you have done the two previous steps correctly, you will see the ‘Joomla’ installation interface on your browser
- The setup process will be done in three steps which are Configuration, Database, and Overview’. We will start with the ‘Configuration’ step
Configuration:
- On the configuration tab, you have to fill in the blank boxes with the required information. And note them for later use (especially the username and password)
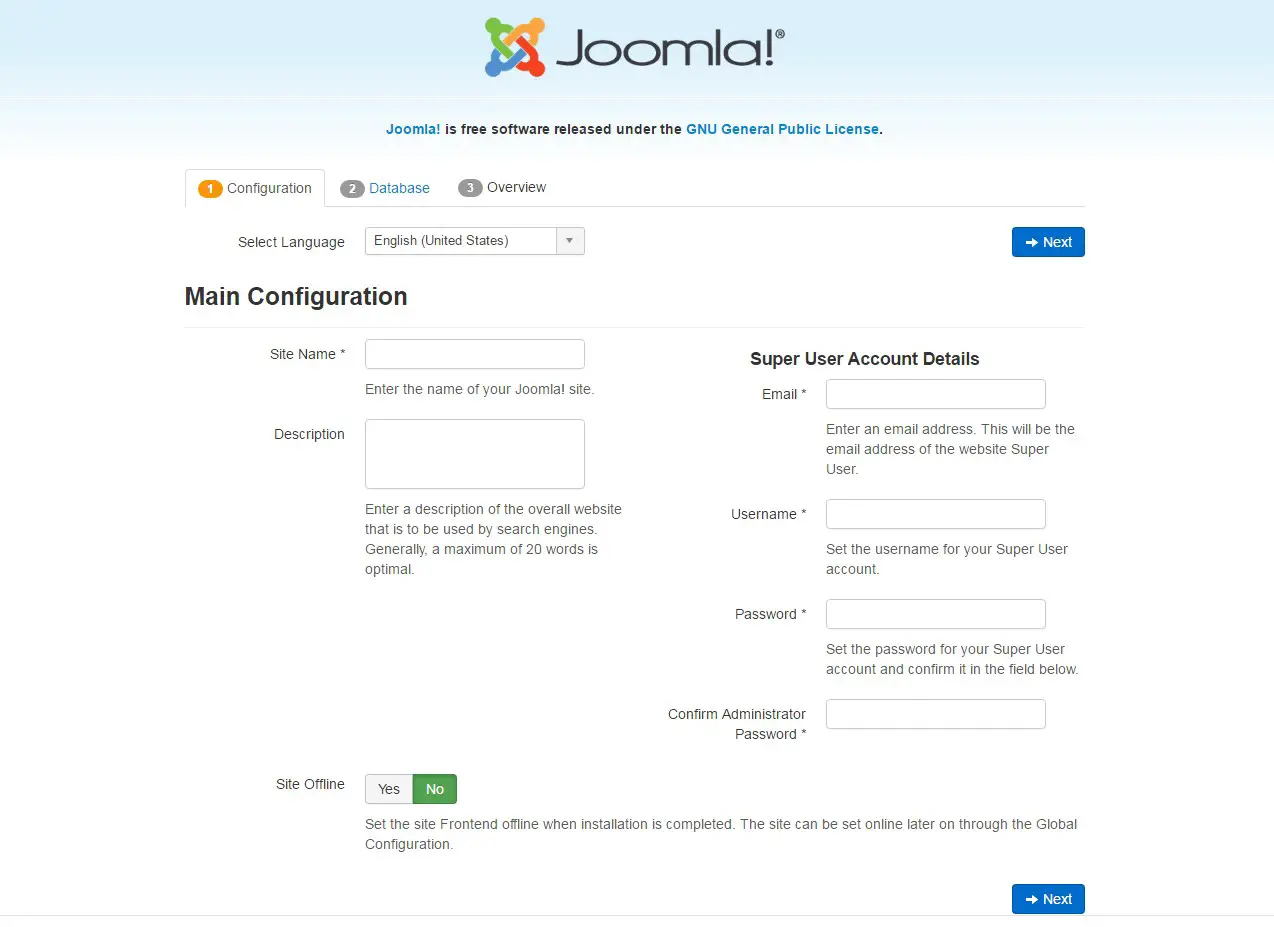
- You can set the status of your site to either online or offline from the ‘Site Offline’ settings
- After everything is OK, click on ‘Next’
Database:
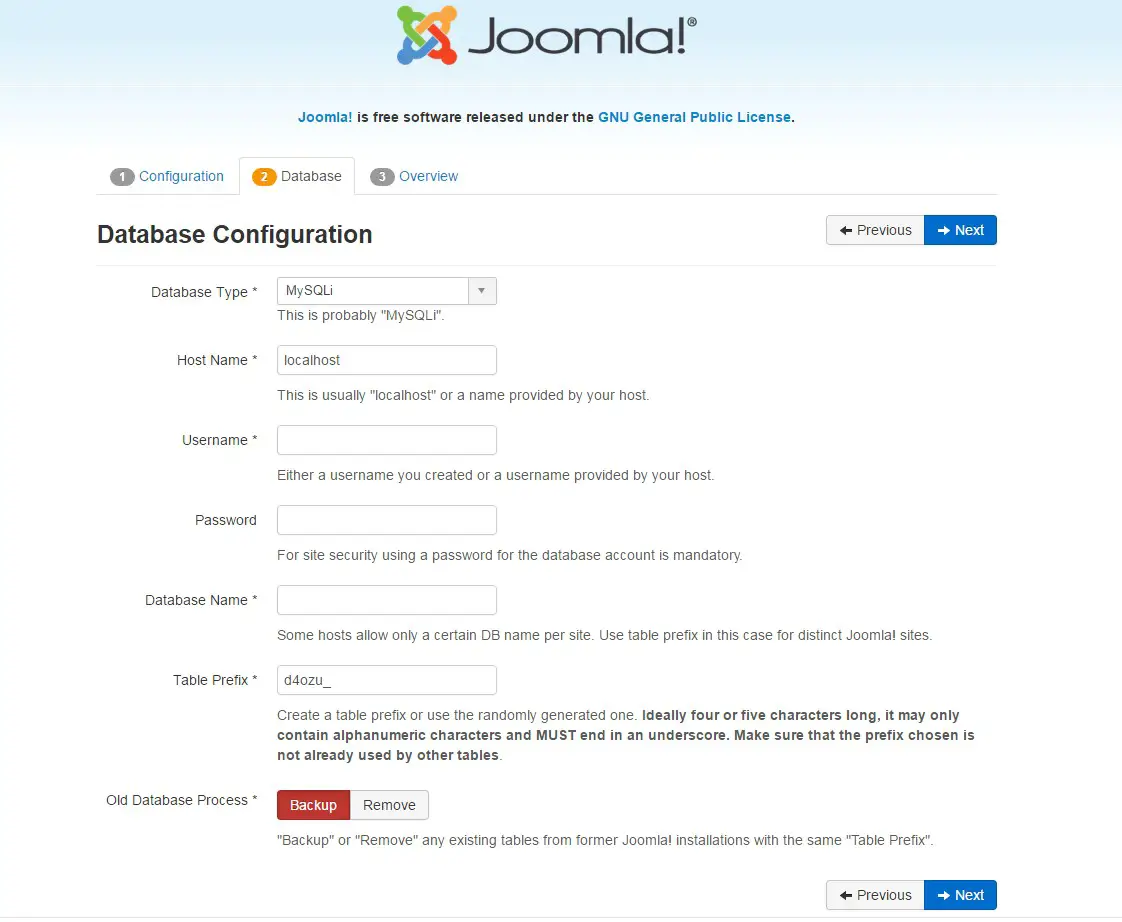
- On the next page, you will have to fill in the blank boxes with your database information
- Here you have to select the ‘Database Type’ to ‘MySQL’. Leave the ‘Host Name’ as it is
- On the ‘username’, ‘password’ and ‘database name’, enter the information which you have saved when you have created the new ‘MySQL database’ in the first step
- No need to change the ‘Table Prefix’
- Keep the ‘Backup’ option selected as it is safe. Then click on ‘Next’ to proceed
Overview:
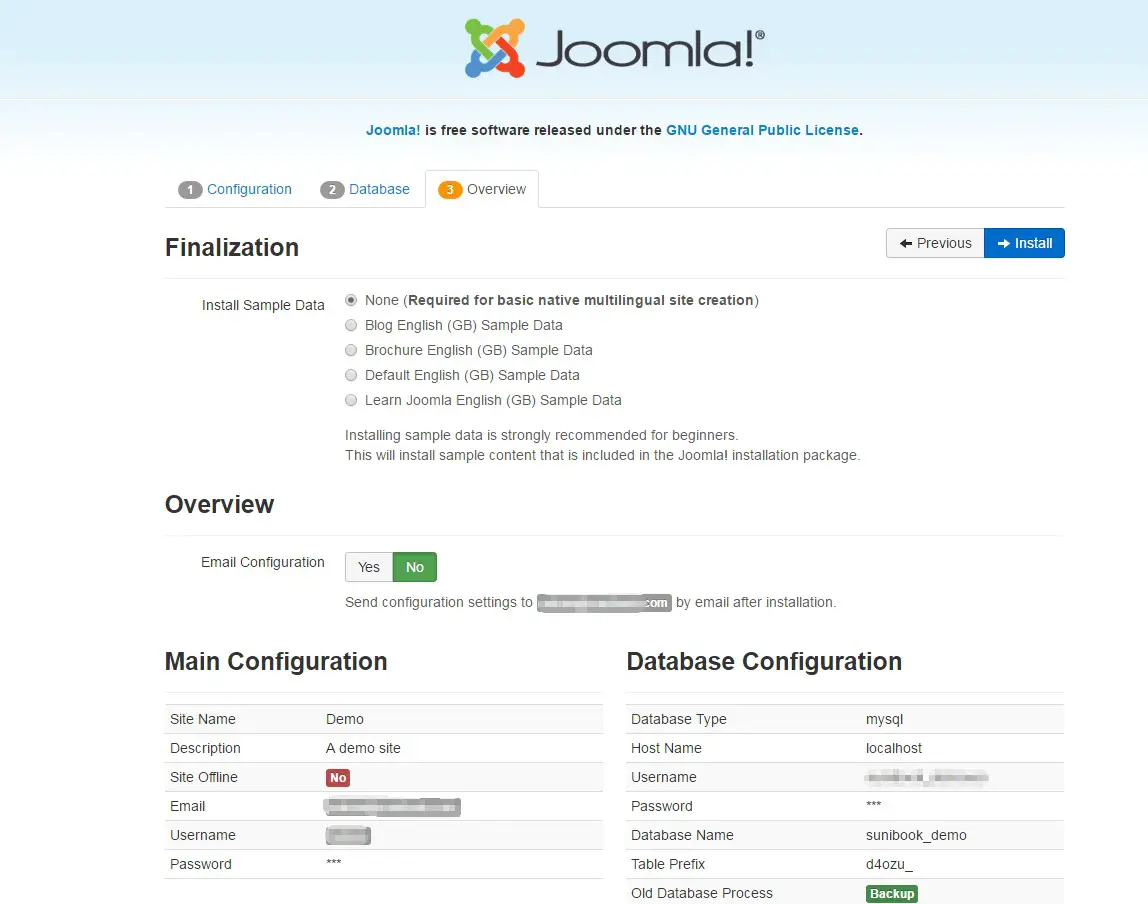
- On the overview section, you can select the ‘sample data’ to install on your site. If you are opening a blog then it is better to select the ‘Blog English (GB) Sample Data’. However, if you don’t need them you can select ‘None’
- If you want to get all of the information like username, password and other details about this installation to your email address. You can click on ‘Yes’ on the ‘email configuration’ option and enter your email address. And, you will receive the email with all of the information after the installation is completed
- Now, check out the section named ‘Pre-installation Check’ if everything is ‘YES’
- And from the recommended settings check if the ‘Actual’ settings match the ‘recommended settings’. If not you can click on the settings and it will change (although these are not important)
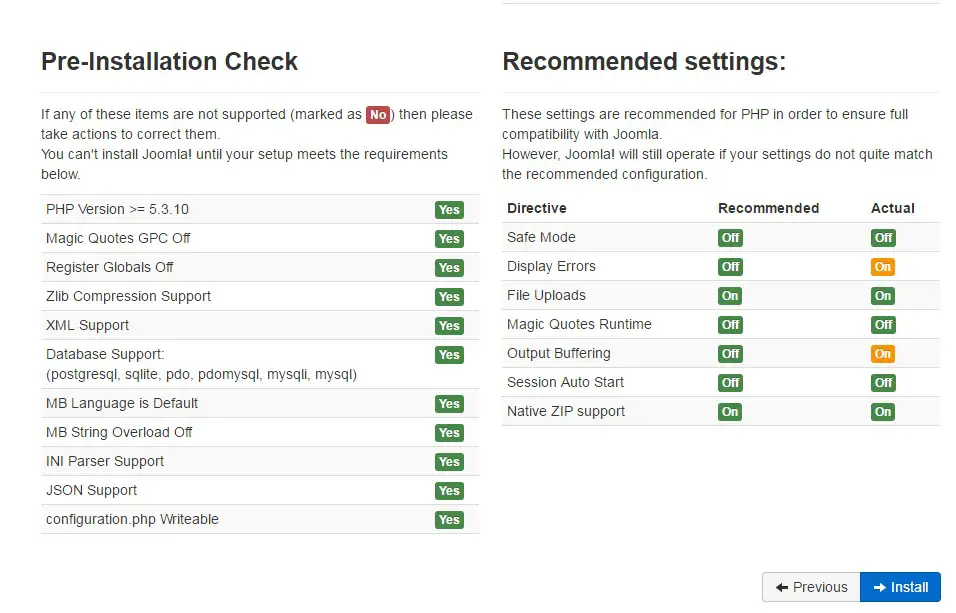
- Now, if everything seems OK to you. Click on ‘Install’ and the installation will start instantly
- After the completion, there will be a ‘Congratulations’ message. And, there will be an option to ‘Remove Installation Folder’. It is very important to remove the installation folder after installing ‘Joomla’. So, click on the option to do that
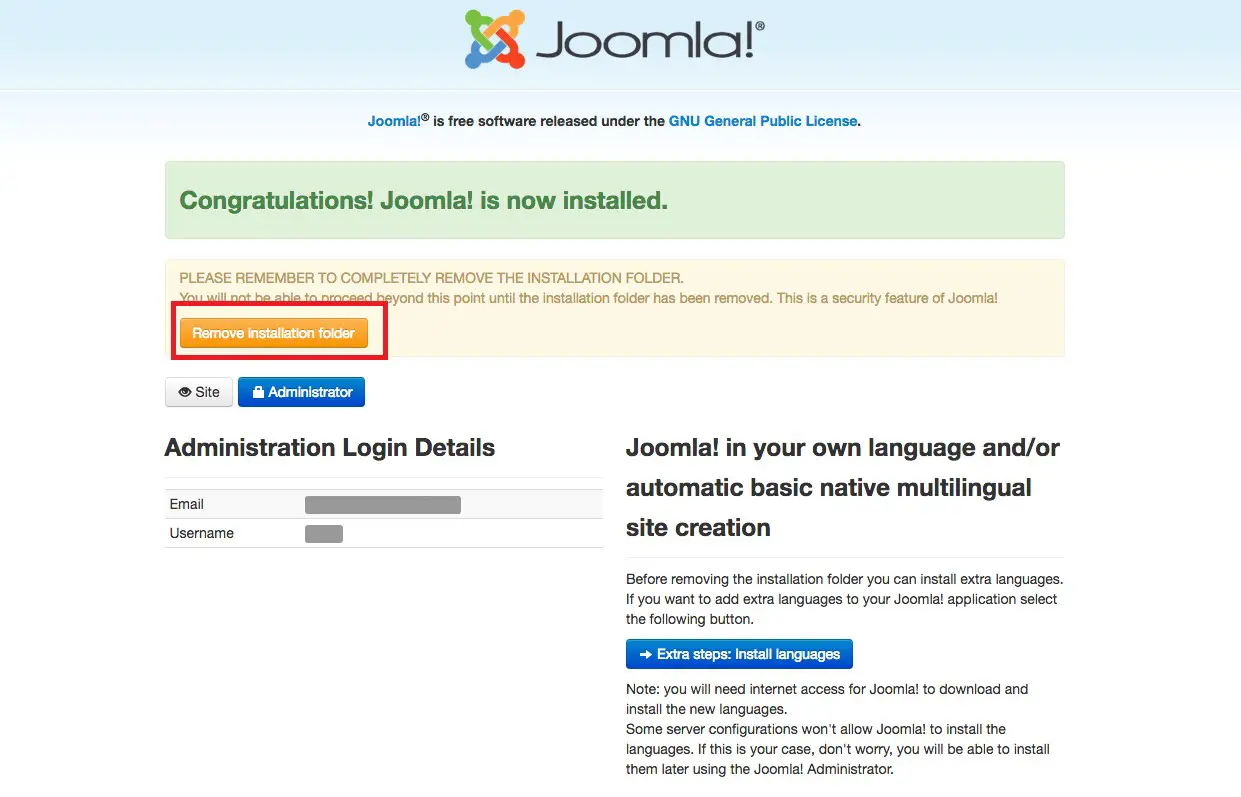
- You can now log in to your ‘Joomla’ based site. If you click on the ‘Administrator’ option, it will take you to the login page of your ‘Joomla’ admin panel. Type your login credentials to log in to your site.
- The login credentials will be the username and password which you have created during creating the MySQL database.Or if you have selected ‘Yes’ on the ‘email configuration’ settings, you will receive them to your email address. So, check your email. And keep them safe.
Last words:
We have tried to cover all of the processes to install ‘Joomla’ on your ‘Siteground’ account. We hope one way or another you will be able to install it with ease.