
DISCLOSURE: This post may contain affiliate links, meaning when you click the links and make a purchase, we receive a commission.
Are you thinking about opening an online store?
If you are. Then you might be deciding which e-commerce software/platform you are going to use on your site. There are lots of e-commerce software/platform out there. So much that it’s easy to get lost if you don’t know where to start.
But, among them ‘Magento’ has the upper hand. As it is an open source platform. Anyone can use, customize it for free. Thus, it has become a popular software for many e-commerce site owners.
So, if you are one of them who is tilting towards using ‘Magento’. In addition, if you are a Siteground web host user, then today is your lucky day.
Read also: Top Magento Hosting
In this article, we are going to uncover all of the methods of installing ‘Magento’ on a Siteground web host. Plus, we will describe the entire process step by step.
But that’s not all.
We are also going to add screenshots to each step. So, even if you are a beginner at this point. After reading this, you will not have any issue installing ‘Magento’ on your site by yourself.
Table of Contents
How to Install Magento on SiteGround
So let’s fire away.
Method 1 – Installing Magento on Siteground with auto installers/Softaculous
At first, we will share the popular and easy method of installing ‘Magento’ on your site. We will uncover the ‘Softaculous’ installation method below. The first step to start the ‘Softaculous installation is to get to the Softaculous installation page (see image below).
There are two ways you can go to the Softaculous installation page. You can follow any one of the methods. But, we will share both of the methods. So, it’s up to you which way you are going to take.
How to go to the Softaculous installation page:
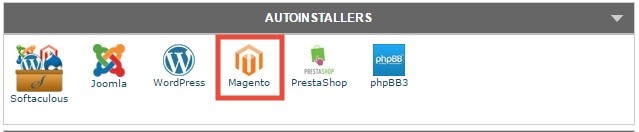
- Login to your Siteground cPanel
- Find the ‘Auto Installers’ Click on ‘Magento’ to proceed to the Softaculous installation page
OR,
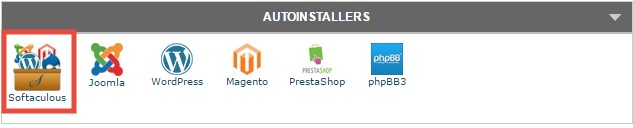
- Login to your cPanel
- Then click on ‘Softaculous’ form under the tab ‘Auto Installer’
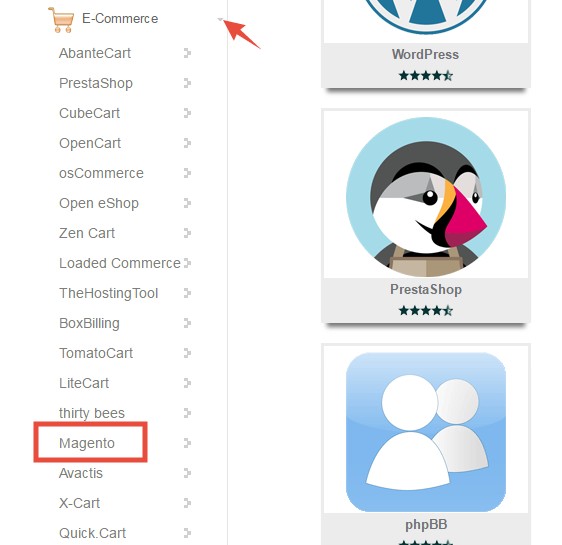
- On the next page, check the left pane. There will be an option named ‘E-Commerce’ click on it
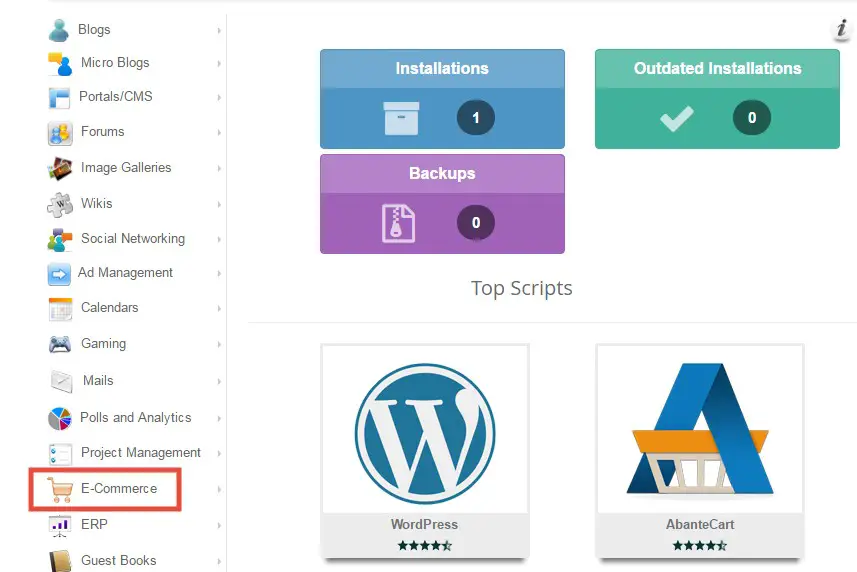
- A drop-down menu will appear with multiple options
- From the drop-down menu click on ‘Magento’. And, you will be able to go to the Softaculous installation page
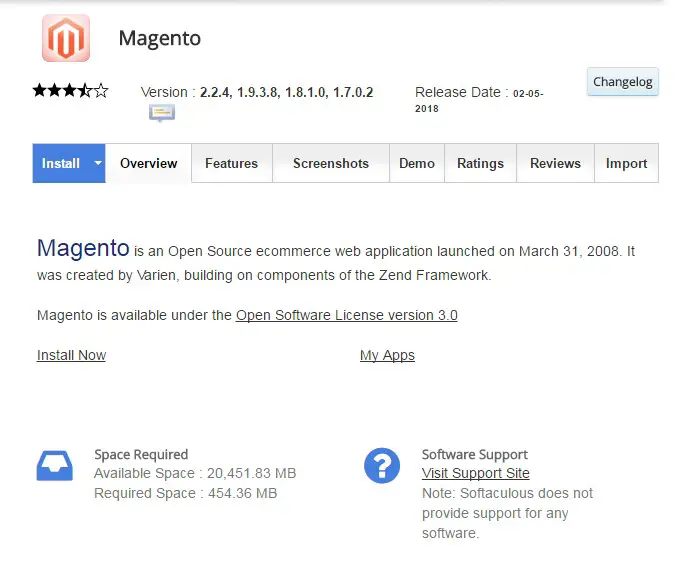
As you are already on the Softaculous installation page. You can start the installation.
There are two ways to install ‘Magento’ using the Softaculous installation. One is ‘Quick Install’ and another is ‘Custom install’. But, we recommend the ‘Custom installation’.
Because if you use the ‘Quick install’, you can’t customize some important settings. But, those customizations are possible using the ‘Custom install’ method.
Additionally, the ‘Custom install’ comes with all of the settings of the ‘Quick installation’. So, without spending more time.
Let’s go.
To start the custom install:
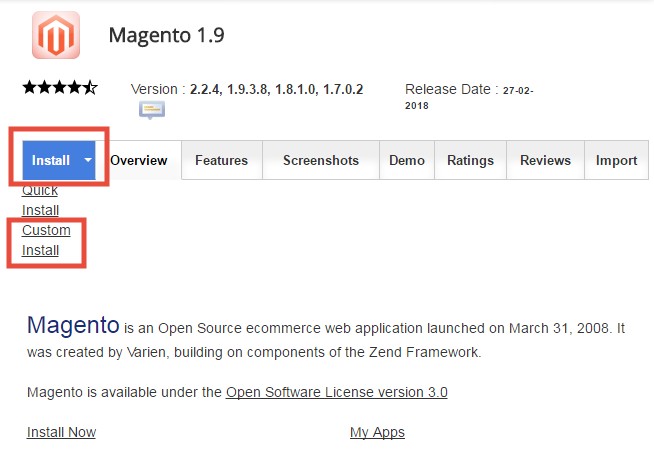
- On the Softaculous installation page, click on the blue ‘Install’ button or the down arrow and then click on the ‘Custom Install’ option from there
- Now, some blank boxes will appear on that page. Where you will have to put some information. We will walk you through the full process below. So, don’t worry.
Software Setup:
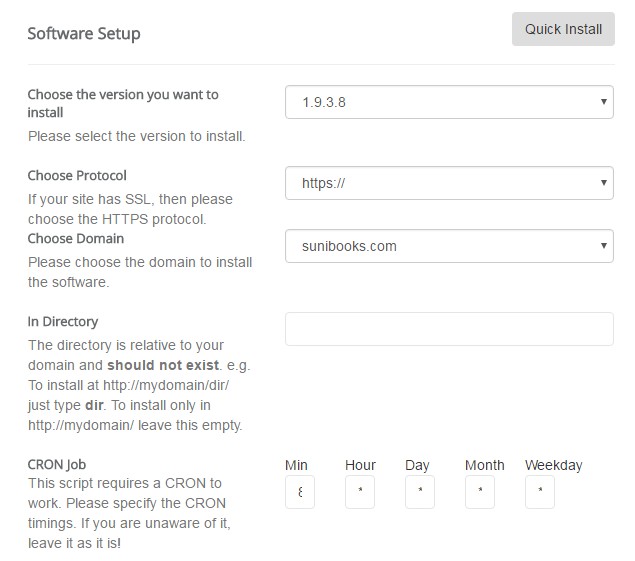
- On this section, you need to deal with 5 options
- First, choose the latest version of ‘Magento’ from the drop-down menu

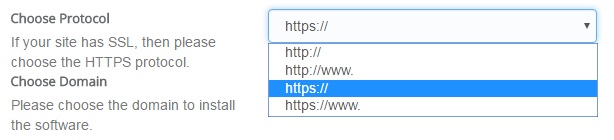
- Then, you need to choose a protocol. If your domain has SSL protection select the ‘https://’ from the drop-down menu. If you don’t have SSL protection with your domain, then choose the ‘http://’ It is not needed to choose either of the ‘http://www’ or ‘https://www’
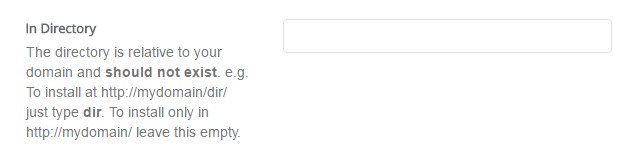
- Next, you will see the ‘In Directory’. You don’t need to change it normally.

In Directory settings But, if you want to install the ‘Magento’ in a subfolder/directory, then you should type the directory name here. Let’s say, your website is ‘www.yoursite.com’. But, you want to open another directory as a store. Then you need to type ‘Store’ on the ‘In Directory’ box. So that your online store’s web address will be like ‘www.yoursite.com/store’
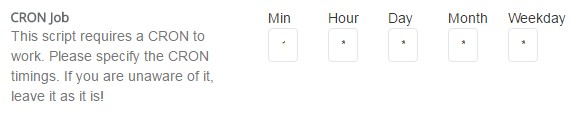
- Do not change anything from the box ‘CRON Job’
Site Settings:
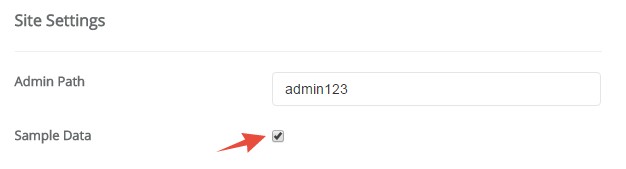
- You can type anything on the box ‘Admin Path’. But, you have to save the information for using later. It will be the extension of the URL of the Magento Admin Panel
- If you want to install your ‘Magento’ site with some samples. Then check-mark the option ‘Sample Data’. But, if you want an empty site which you are going to customize your way. Then don’t check-mark the option
Admin Account:
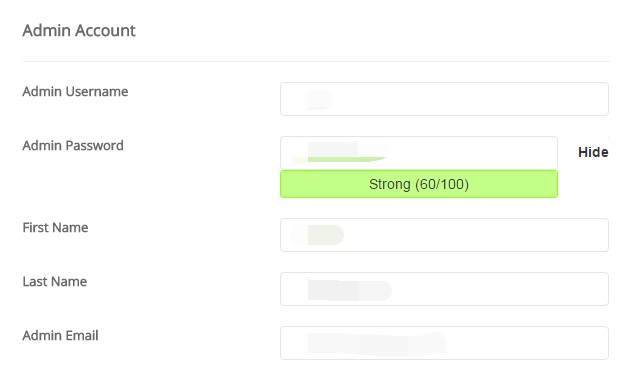
This section is important. You have to save the information of this section. It will be needed when you are going to log in to your ‘Magento’ site later.
- Type a username on the box ‘Admin Username’. Remember, do not use typical names like admin, user, administrator etc. As these are too common, it will be very easy to guess (if anyone tries to hack your site)
- Create a strong password. Or you can keep the auto-generated one. But, note this down, as it will be needed later
- Give your first name and last name
- And, give a valid ‘Admin Email’. You will need it to reset your password (if you accidentally forget your password anytime)
Advanced Options:
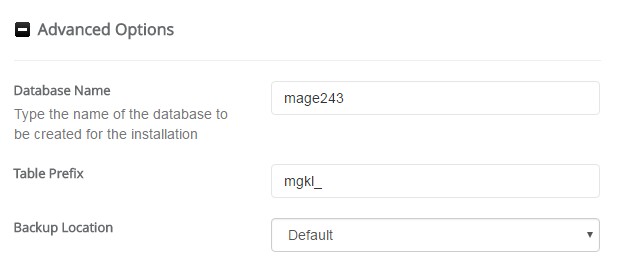
- On this section, you don’t need to type anything. But, it is better if you note the information from this section
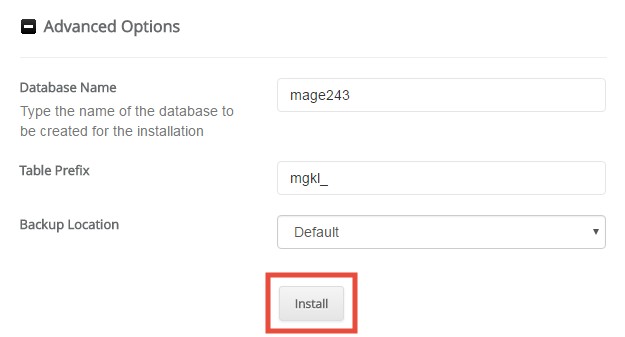
Installation:
- Double-check everything, and note down the information which will be needed later. And, then if you’re satisfied with all of the options, click on ‘Install’
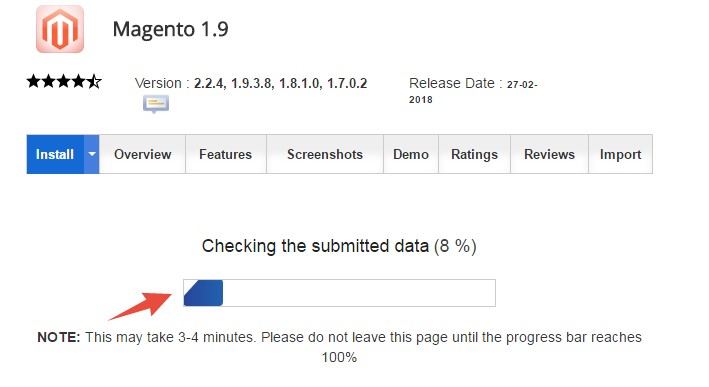
- The installation will be started instantly. And you will see a progress bar. It will take about a minute to install ‘Magento’ on your Siteground web host. However, do not close that page until the installation is finished
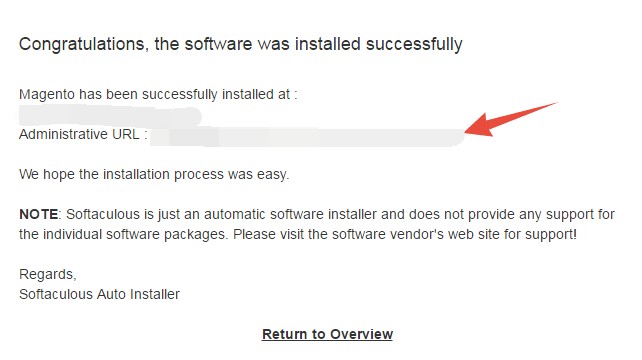
- When the installation is completed. A new page will appear with a ‘Congratulations’ It will also contain the ‘Administrative URL’ of your ‘Magento’ admin panel. Most of the time the default ‘Administrative URL’ of a ‘Magento’ site becomes like yoursite.com/index.php/AdminPath. You have selected an ‘Admin path’ on the ‘Site Settings’ section earlier. So, ‘yoursite’ will be changed by your site’s real domain and ‘Admin Path’ will be changed with the info you have given on the ‘Admin Path’ section earlier. It is better to bookmark or note the admin URL as you are going to use it regularly from now on.

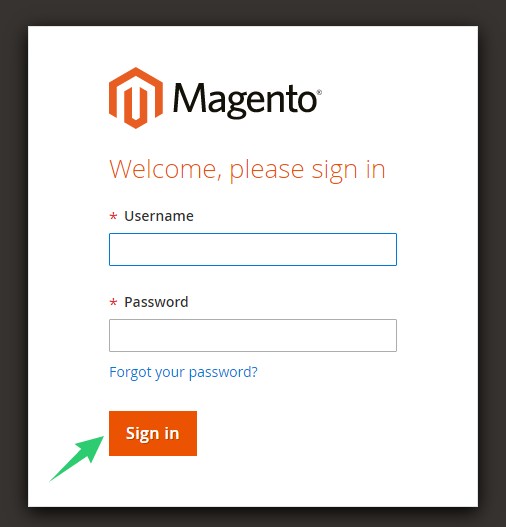
Installation completed - To log in to your ‘Magento’ admin panel, click on the ‘Administrative URL’ (or go to yoursite.com/yourAdminPath). And, you will be on the login page. Enter your admin username and password. Then click on ‘Sign in’ to finally enter into the backend of your ‘Magento’ site
Take a deep breath! You have just learned the method of installing ‘Magento’ on your Siteground web host. So, it is time for another method.
Method 2 – How to install Magento on Siteground manually
Next, we are going to share the process of installing ‘Magento’ manually on a Siteground account.
So, keep reading and you’ll find out.
How to install ‘Magento’ on Siteground manually:
This section is a bit lengthy. So, for your ease, we are going to split the whole big process into multiple small parts.
The small parts:
- How to create a MySQL Database
- How to Download and Upload the ‘Magento’ installation file to your web host
- How to finalize the installation
Let’s begin with the first one.
How to create a MySQL database on Siteground:
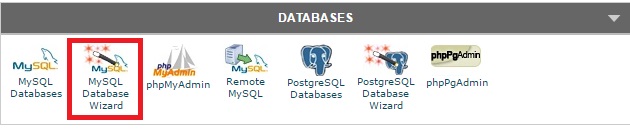
- Go to your cPanel
- And, click on the ‘MySQL Database Wizard’
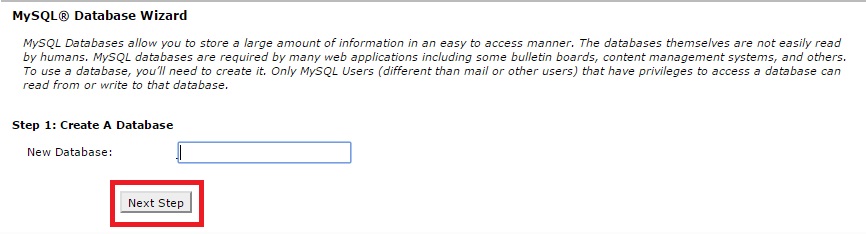
- Type a name for the new database. And, note it down somewhere safe. Click on ‘Next step’ to proceed
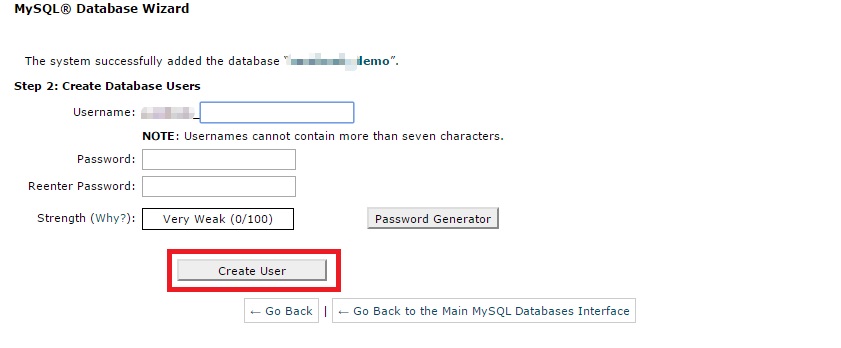
- Now, type a username for the database with a strong password. Again, note the username and password for using them later. And, click on ‘Create User’
- On the third step, check-mark the box next to the option ‘ALL PRIVILEGES’. And, click on ‘Next Step’

- On the next step, you will see the username and the database name, which means the creation of the new MySQL database is finished

Download the ‘Magento’ installation file:
In this part, we will tell you what to download and from where to download.
- Go to the official download page of ‘Magento’. There will be two different versions of ‘Magento’ installation files. One with sample data & another without the sample data. If you want to customize your site yourself, then download the files without the sample data. However, if you don’t have any experience using ‘Magento’ then download it with sample data.
- Always choose the latest version and download it in ZIP format
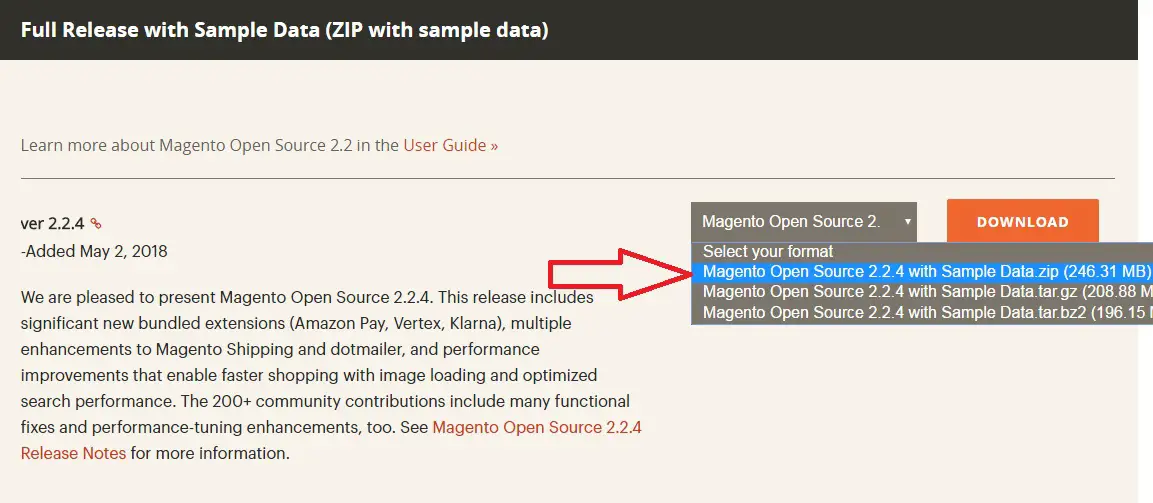
- But before downloading, you need to login to your ‘Magento’ account
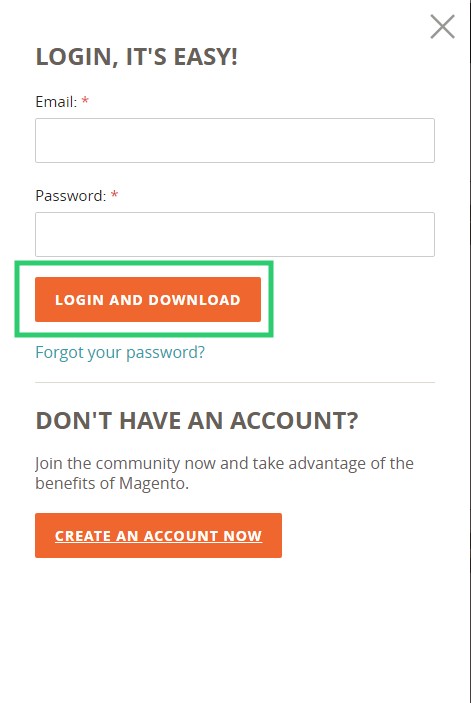
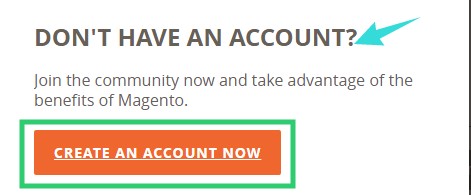
- If you don’t have an account. Click on the ‘Create an Account Now’ and create a new account there
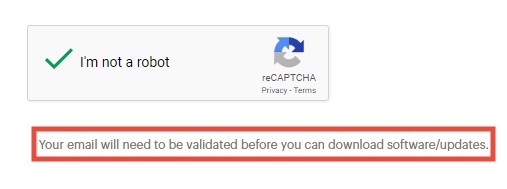
- Remember to check-mark the box next to the ‘Terms and Conditions’ on the account creation page

- Also, verify your email address before downloading
- After creating the account finish the download of ‘Magento’ installation file to your PC
As you have downloaded the ‘Magento’ installation file, it is time to unzip it.
Remark: if you know how to unzip and zip a file/folder, then you can skip this part
Unzip the file:
You can use any type of archiver software to unzip the file. We have used WinRAR trial version. You can download the software here – WinRAR (32-bit) & WinRAR (64-bit). Install the software on your PC. Then:
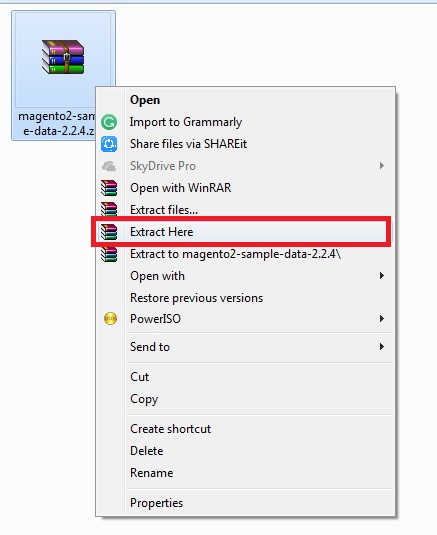
- Right-click on the zip folder and click on ‘Extract Here’
- After the extraction is completed, you will find a new folder
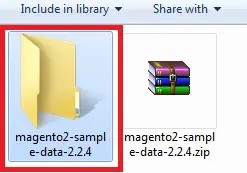
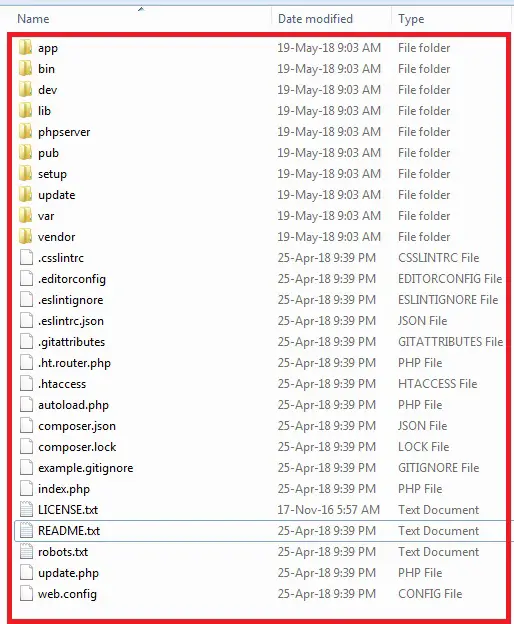
- And double-click on that folder to open it. There will be multiple files in that folder. These files need to be zipped again
How to zip the files:
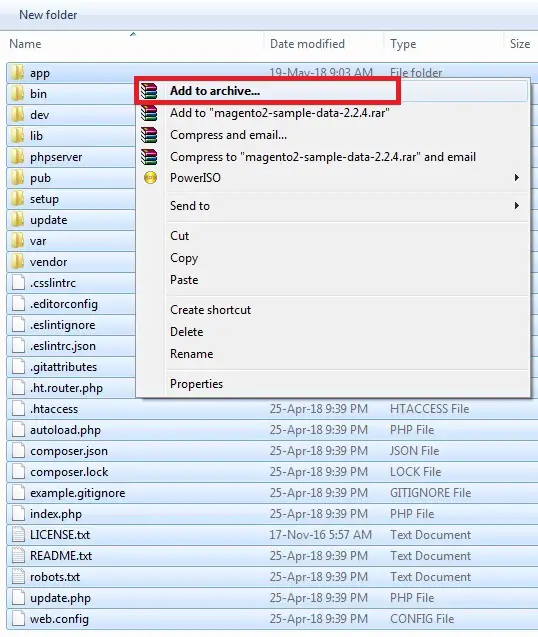
- Select all of the files by using the keyboard shortcut CTRL+A. Or you can also click and drag your mouse over the files to select all of them
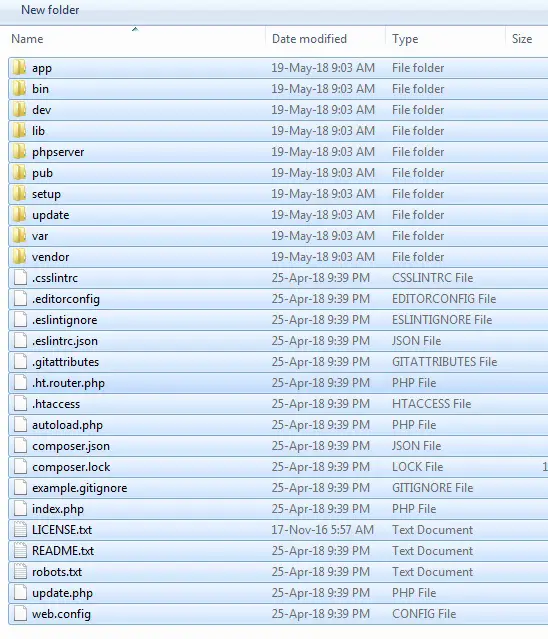
- Now right-click and then click on ‘Add to Archive’. A new window will appear
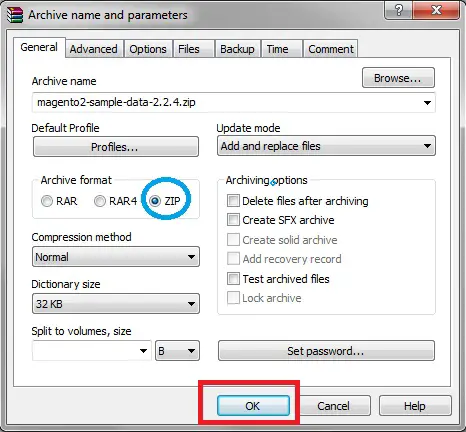
- From that window, change the ‘Archive Format’ and select ‘ZIP’. You don’t need to change anything except this option

- Now, click on ‘OK’ to start the zipping process
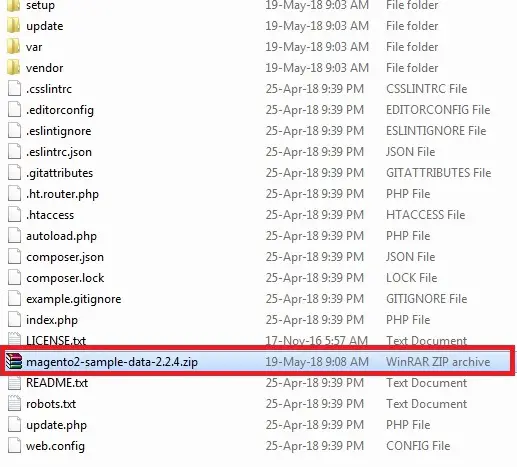
- A new ZIP file will be created in the same folder. Remember its location as you are going to upload this in the next part
Upload the installation file (Magento):
There are a lot of ways to upload a file to your web host. You can use different types of FTP software to do that. However, we are going to share more of a straightforward one. Yes, we are talking about the process of uploading a file directly to your web host (using ‘File manager’).
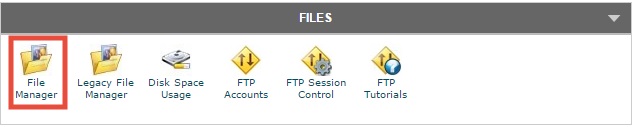
- Log in to your Siteground cPanel
- You need to click on ‘File Manager’ option which will be under the ‘Files’ tab
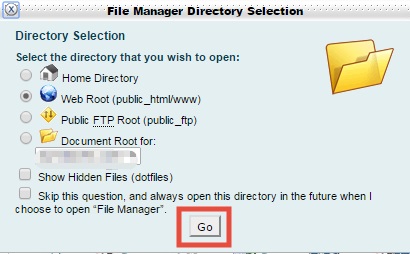
- Then a popup will appear. Click on ‘Go’ to proceed
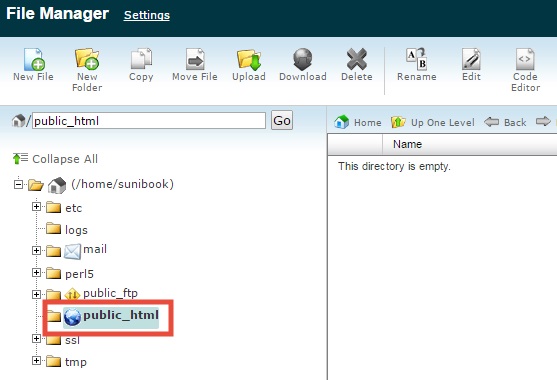
- A new tab will open. On that page, click on ‘Public_html’ (it will be on the left pane).

Click on ‘Public_html’ If you want to set your website to any address other than ‘yoursite.com’ then you should create a new folder here. For example, if you want the ‘Magento’ to be installed on ‘yoursite.com/store’; then create a new folder named ‘Store’ in the ‘Public_html’ folder. So, the ‘Public_html’ folder is the main directory and any new folder you create inside this folder will be a new extension to your main domain.
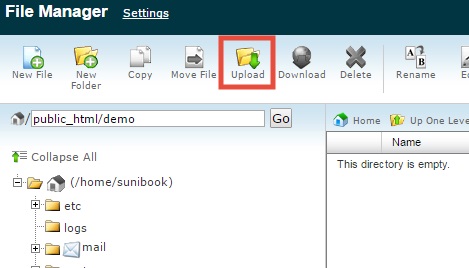
- As we will install the ‘Magento’ on our main domain. So, we are uploading the file into ‘Public_html’. That’s why, click on ‘Public_html’
- Then click on ‘Upload’ from the top menu. A new tab will be opened
- On the new tab, click on ‘Choose File’ and select the ZIP file you just created
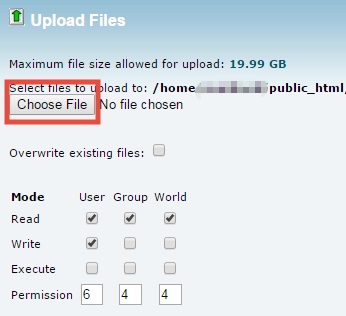
- The upload will start instantly. Do not close the tab until the upload is finished
- When the upload is finished, you will see a notification on the bottom -right corner of the screen
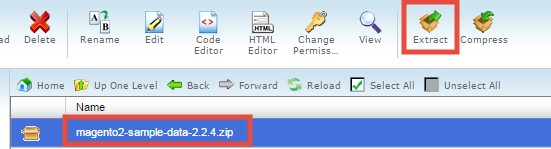
- Now, go to the previous tab (the Public_html folder), and refresh the page. After refreshing, you will see the ‘Magento’ zip file on that folder
- Click on the file to select it. Then click on ‘Extract’ from the top menu
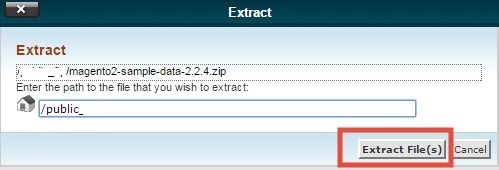
- A new popup will appear, click on ‘Extract Files’ to start the operation
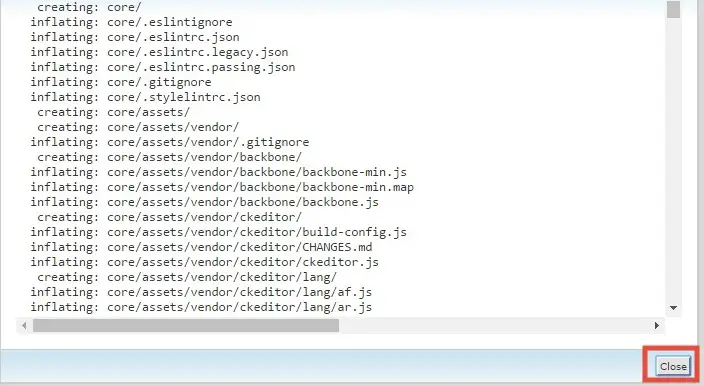
- After the extraction is completed (it will take about 10 seconds), another popup will come with the extraction result. Click on ‘Close’ to dismiss it
- Now, you can close everything as you have completed the upload of ‘Magento’ file to your Siteground host
Finalizing the installation:
Now, you will start the installation process. To do that:
- Go to your site from a PC browser. Here, your site’s URL will vary depending on the upload location of your ‘Magento’ file. If you uploaded directly on ‘Public_html’ then it would be like ‘yoursite.com’. But if you have uploaded it to any new folder, then it will be different. For example, you have uploaded the file to a new folder named ‘Store’ which was created inside the ‘Public_html’. Then the site URL would be like ‘yoursite.com/store’.
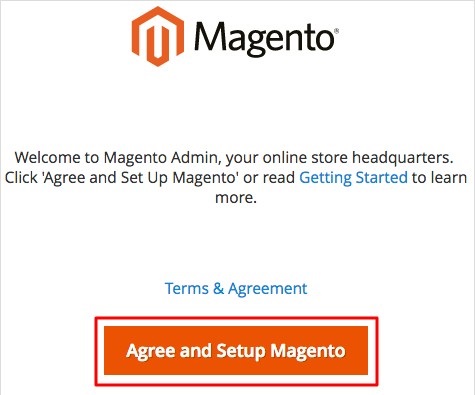
- After going to your site, you will see the welcome page of ‘Magento’ installation
- Click on ‘Agree and Setup Magento’ button to advance
Now, we will have to fill some boxes with some information. We will walk you through the whole process below step by step.
Readiness Check:
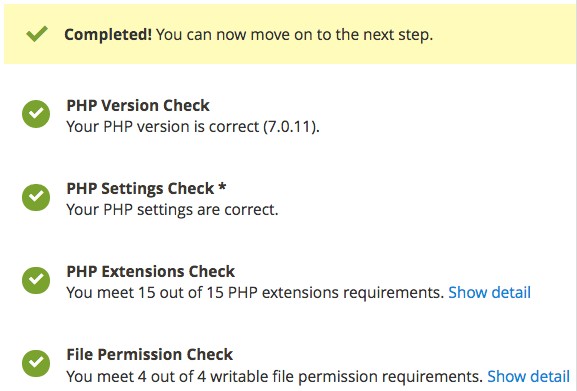
- The next section will be ‘Readiness check’. It will check if your web host has all the required settings ready or not
- If everything is OK, then click on ‘Next’ to move to the next section
Add a Database:
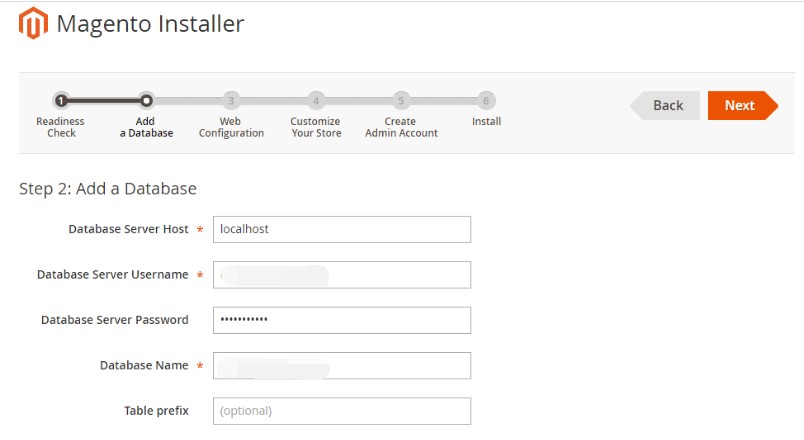
- On this section, you will provide the information about the ‘MySQL Database’ you previously created
- Do not need to change the database server host
- Type the database username, password, and the database name
- Double-check if every information were correct. Then click on ‘Next’
Web Configuration:
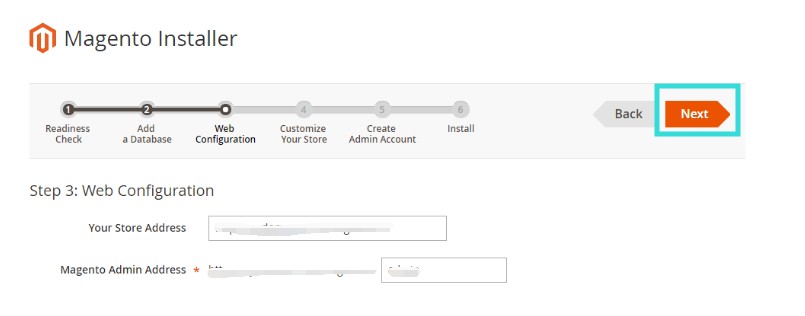
- You don’t need to change the ‘Your Store Address’ on this section
- However, you can change the ‘Magento Admin Address’. But, we don’t think you need to do that. Note down this information for later.
- So, click on ‘Next’ to advance
Customize your store:
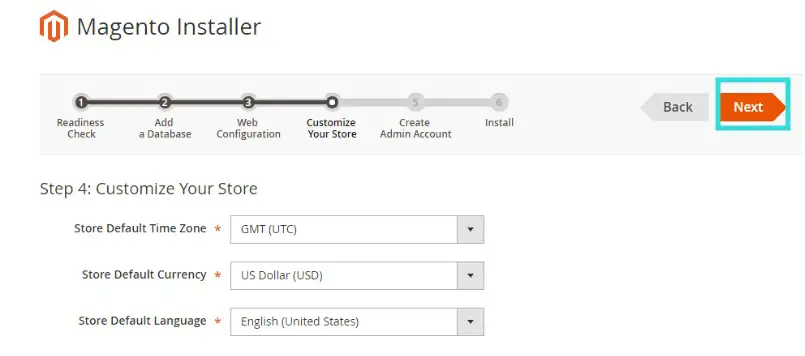
- Here, you will set the default time zone, currency and language of your Magento website
- If everything is OK. Click on ‘Next’ to continue
Create Admin Account:
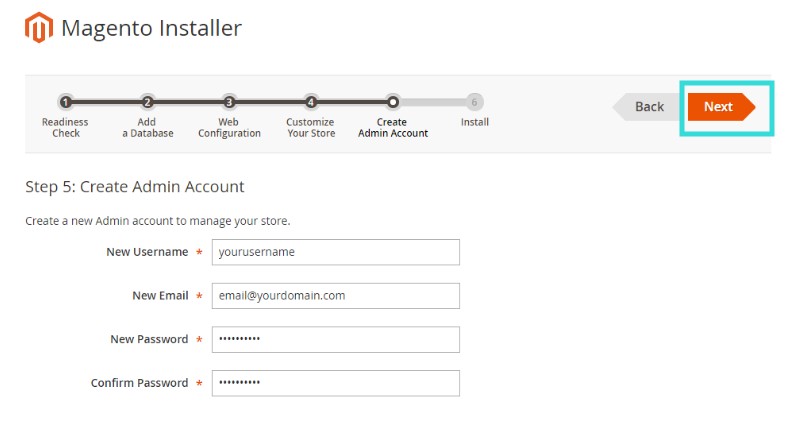
- Type in a username on the first box. But, refrain from using any generic username like Admin, User etc. As these are pretty easy to guess. It makes the security of your site vulnerable.
- Type a valid email on the ‘New Email’ Box
- Finally, type a strong password
- After that, click on the ‘Next’ button to advance
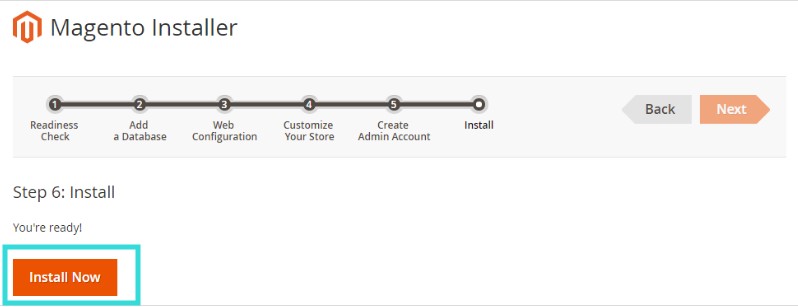
Install:
- This is the last step. Just click on ‘Install Now’ to start the installation of ‘Magento’ on your site
- After the installation is completed. You will see a new page with a ‘Success’. And, it will also contain all of the information you have just provided in the previous sections. You should save that information for using later
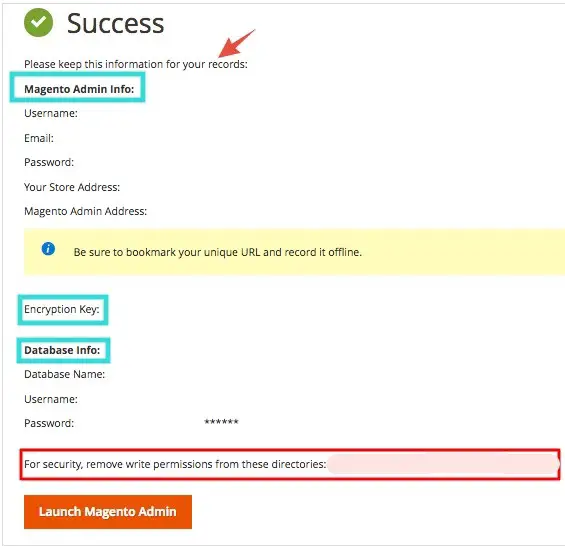
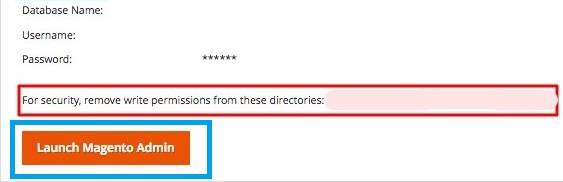
- And, if you want to login to the back-end/admin panel of your ‘Magento’ site, then click on the ‘Launch Magento Admin’ button to proceed. Also, please bookmark the admin page URL as it will save your time every time you are going to log in there

Enter into Magento admin Panel Another thing, most of the time the default Administrative URL of a ‘Magento’ admin page looks like this – ‘yoursite.com/index.php/Magento Admin Address’. Here, you created the ‘Magento Admin Address’ during the ‘Web Configuration’. We told you to save it.
- After reaching the login page, enter the login credentials and click on ‘Sign in’

And boom! You’re there. Yes, you have just learned the manual way of installing ‘Magneto’ on a Siteground web host.
Let’s rewind:
So, if you have read this whole article. Then you know how to install ‘Magento’ on your Siteground hosting account. So, give yourself a cookie and start creating your new site.
Hi Mike, thanks for reviewing Magento installation with siteground, I am using Cloudways and its more easier, https://www.cloudways.com/en/magento-managed-cloud-hosting.php