
DISCLOSURE: This post may contain affiliate links, meaning when you click the links and make a purchase, we receive a commission.
Did you know that you could automate most of the repetitive tasks on your websites?
Yes, you heard that right. If you use the ‘Cron’ utility, you can do that with ease. If you don’t have any idea what ‘Cron’ utility is or the uses of it then let me clarify, first.
‘Cron’ is a Linux based utility which you can use to schedule tasks to be executed at specific times automatically. And the tasks which are scheduled using the ‘Cron’ utility are known as ‘Cron Jobs’. Another important thing about the ‘Cron’ utility is that you can add as many ‘Cron Jobs’ as you want to.
Most of the popular web host providers offer the ‘Cron’ utility on their cPanel. Siteground also provides this awesome ‘Cron’ utility with every type of hosting plans. So, if you are a SiteGround web host user then you can use this utility. If you don’t know how to use the ‘Cron’ utility to set up a ‘Cron Job’ then you are at the right place.
Because in this post, we will show you how to set up ‘Cron Jobs’ on a Siteground web host account. As always, we will attach screenshots to each step to make the article simple for all of you.
So, let’s jump right in.
How to Setup ‘Cron Jobs’ on SiteGround
Steps to follow:
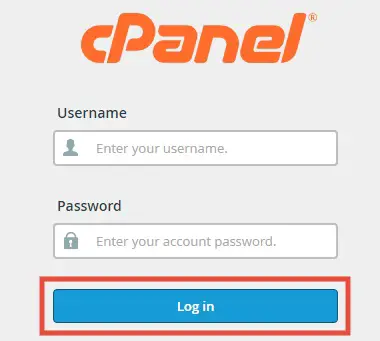
- Log in to the cPanel dashboard of your SiteGround web host account
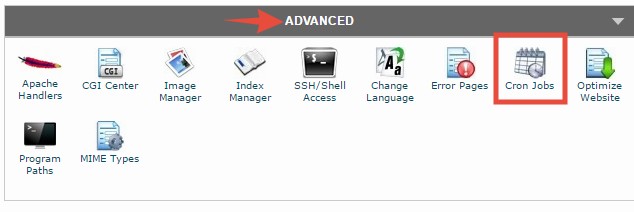
- Now, scroll down to the bottom of the page to locate the ‘Advanced’ section. Now, from that section click on the ‘Cron Jobs’ button to access the ‘Cron Job’ interface
- On the next page, you will see the ‘Cron Job’ interface. There are a lot of settings need to be customized here. We will break this entire section part by part next

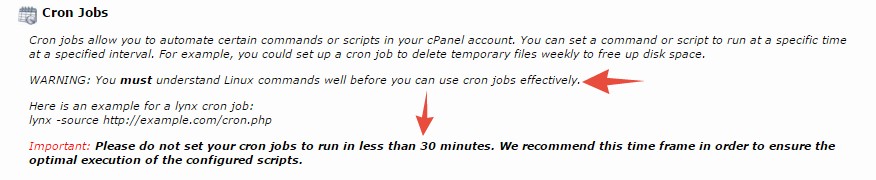
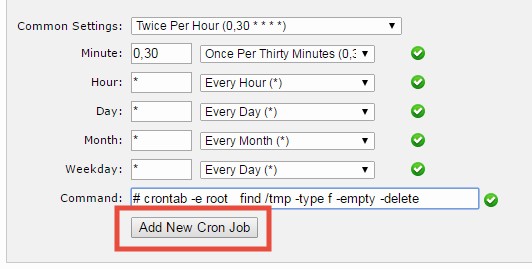
- The first section is the ‘Cron Jobs’. In this section, you will find a summary of the uses of ‘Cron Jobs’. And you will also see some warnings. The first warning is that you need to have an understanding of Linux Commands to set up ‘Cron Jobs’ successfully. And the second one is also another important warning. You should not set the ‘Cron Jobs’ to run in between less than 30 minutes. If you do so, it will put a lot of pressure on your server which can slow down your website. That’s why we also highly recommend you not to set the ‘Cron Jobs’ to run in less than 30 minutes
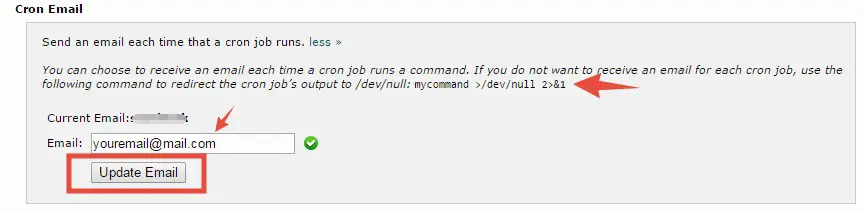
- The second section is the ‘Cron Email’. If you want to receive an email to your email address each time a ‘Cron Job’ is performed then this section is for you. You have to enter a valid email address on the ‘Email’ box and click on the ‘Update Email’ button. However, if you don’t want to receive an email then you can use a specific command to opt out of that. Although, we recommend you to add an email address
- The next section is the ‘Add a New Cron Job’. Here, you can set the schedule and the Linux command to perform by the ‘Cron’ tool
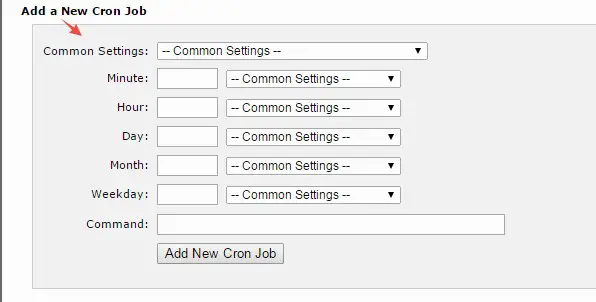
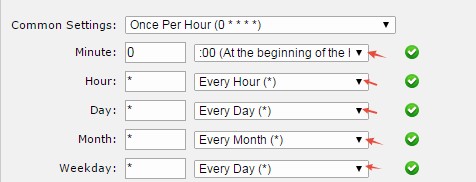
- If you click on the ‘Common Settings’ drop-down menu, you can select how frequently you wish to run the ‘Cron Job’ commands. Remember, you should not select anything less than 30 minutes. Other than that chose any duration. For example, we have selected ‘Once Per hour’
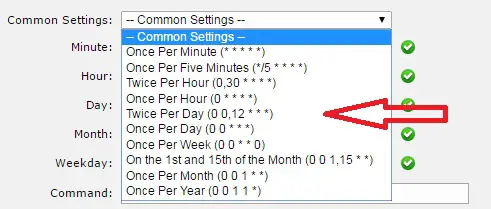
- You can also individually set up the ‘Minute, Hour, Day, Month, Weekday’ etc. from this section
- After that, you need to enter the command on the ‘Command’ box. You can add any commands as you want to. But, it is better if you know what you are doing

- When you’re done with all of the settings, click on the ‘Add New Cron Job’ button
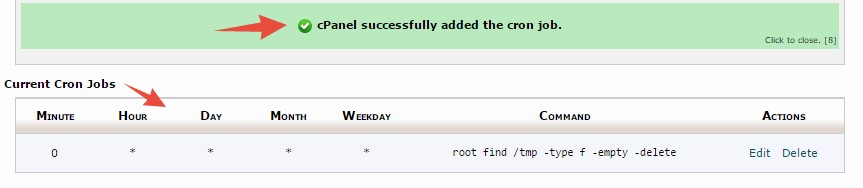
- The ‘Cron Job’ will be added instantly, you will see a ‘successful’ notification on the screen. Along with that, you will see the new ‘Cron Job’ is already added to the ‘Current Cron Jobs’ section
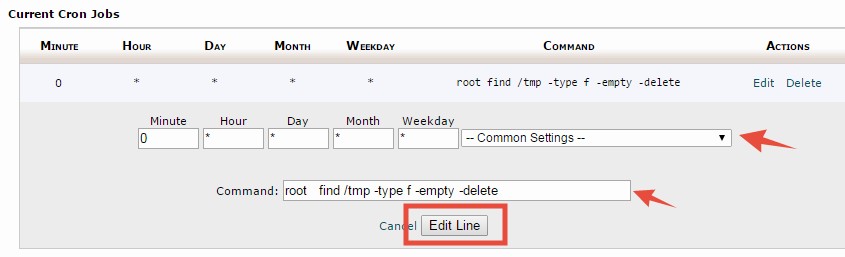
- If you want to edit any ‘Cron Job’ then click on the ‘Edit’ button next to that particular ‘Cron Job’

- It will bring out the ‘Common Settings’ and the ‘Command’ boxes. You can edit them. After editing, you have to click on the ‘Edit Line’ button to save the changes
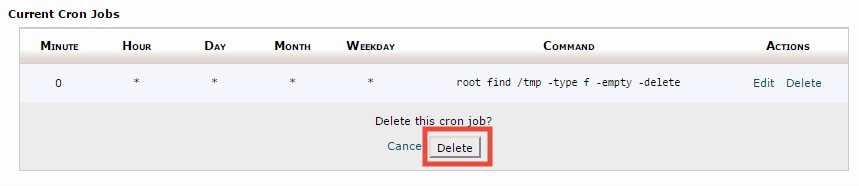
- You can also delete a ‘Cron Job’. To do that, simply click on the ‘Delete’ button from next to the particular ‘Cron Job’ under the ‘Current Cron Jobs’ section

- In doing so, you will be asked if you want to delete this ‘Cron Job’. Just, click on the ‘Delete’ button to remove the ‘Cron Job’ for good
- By following the same method above, you can add more new ‘Cron Jobs’ if you need to
Congratulations. By this time, you have learned how to add a ‘Cron Job’ to your SiteGround web host account. We hope, by using this you can automate a lot of smaller tasks from now on. If you haven’t started using the ‘Cron’ utility then you should try this right away.