DISCLOSURE: This post may contain affiliate links, meaning when you click the links and make a purchase, we receive a commission.
Do you want to know how the website owners set up email accounts with their domain name?
Usually, the email addresses look like ‘[email protected]’/’[email protected]’ etc. This type of emails looks more professional than using a personal email address. So, you should start using one on your website, if you haven’t already.
If you don’t know how to set up email accounts like that then you are at the right place. Because in this article, we will let you know the method of setting up an email account using your domain name. Prior to that, you need to have a hosting account which offers domain email for free with your account.
Most of the hosting providers provide it for free. So, if your one does then we can proceed. If your hosting provider does not provide a free domain email then you should move from them. We recommend SiteGround hosting as they provide domain email for free. Thus, we will explain how to setup email accounts on a SiteGround web host.
So, if you are ready. Then let’s get going.
How to Setup Email Account on SiteGround
Steps to follow:
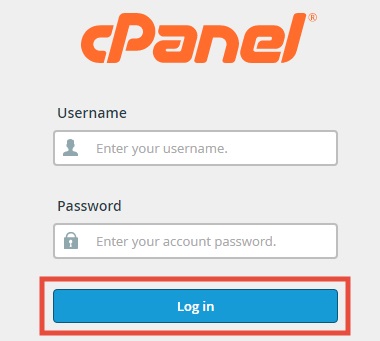
- Login to the cPanel dashboard of your SiteGround account
- Now, scroll down to the ‘Mail’ section. Click on the ‘Email Accounts’ button from there

- On the next page, you will need to fill up some forms to proceed
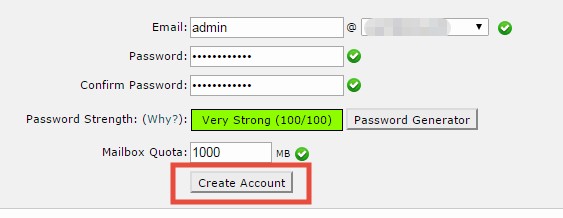
- The first empty box would be the ‘Email address’. You have to enter the first part of your email address. You can use anything like admin, info, help, administrator etc. in the first part of the email address (we chose admin). The last part of your email address would be the domain name of yours. And the domain name will be chosen automatically. If you have more than one domain name then you can select the other ones from the drop-down menu

- Next option is the ‘Password’. There are some rules you need to follow to set a valid password. The first rule is to use a password which consists of more than 5 characters. And, the second one is that the password strength must be at least 70. You will see a ‘Password Strength’ indicator below the password box. So, enter a password according to the required criteria

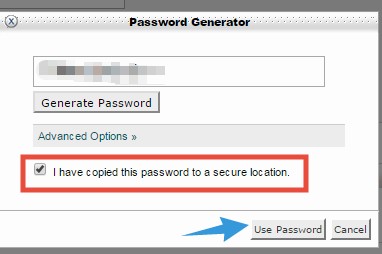
- Or you can use the ‘Password Generator’ button to create a strong password. To do that click on the ‘Password Generator’ button

- Then a popup will appear. At first, copy the auto-generated password from that popup and save the password somewhere safe. Then check-mark the option ‘I have copied the password to a secure location’. At last, click on the ‘Use Password’ button. The password will be automatically entered. Remember to save the password for later. It will be needed in future
- Then, you need to enter the mailbox quota. SiteGround offers different mailbox size for different hosting plans. You will see a message about the limitation of the mailbox size at the top of the screen
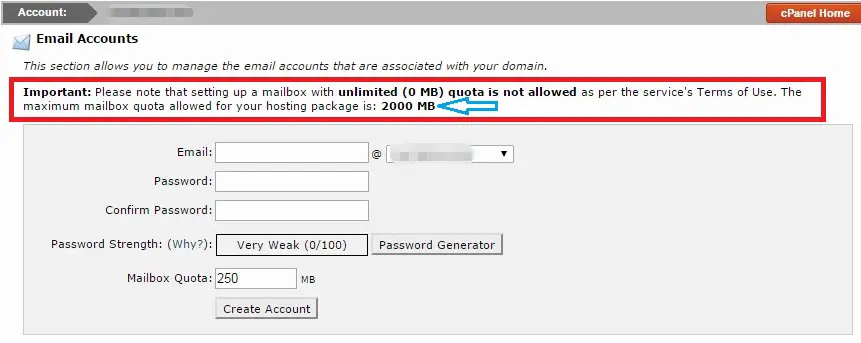
- So, check for the limitation on your account and enter the size of the mailbox on the ‘Mailbox Quota’ box. We have used 1000 MB. You can use anything you want to up to your limitation

- If you are satisfied with all of the information you provided in this section, click on the ‘Create account’ button
- You will see a notification saying ‘Account Created’. This notification will be automatically disappeared

- You will find the newly created account in the ‘Account @ Domain’ section

- You can also do some customization to the accounts after creating them. You can change the password, change Quota and also delete the account

- If you click on the ‘More’ button from under the ‘Actions’ section, two options will appear named as ‘Access Webmail’ and ‘Configure Email Client’. The First option is to use webmail service which comes with your SiteGround web host. And the second option is to configure any email clients to receive and send emails

You can create multiple email accounts using the same method. This is a very easy method to follow. So, we hope this will be helpful for you.